
How Microsoft Power Platform is helping to modernize and enable...
In this webinar, our experts showcase a variety of demo use cases of how different components of the...
As part of Release Wave 2, Microsoft is updating the Power Platform CLI by expanding on administrative commands that can be made against Power Apps Portals. That’s right – the ability to authenticate to Dataverse, list available Portal websites, and upload or download Portal configuration files are now available via Command Line Interface. This means Professional Developers can benefit from faster, more reliable Portal deployments that enable Continuous Integration/Continuous Deployments (CI/CD), not only by integrating to Source Control, but also allowing deployments to any Dev/Test/Production Dataverse environment. Today’s blog will highlight the new features included in Portal Support for Power Platform CLI and will explore the possibilities for automation via Azure DevOps Pipelines.
So, what is the Power Platform CLI? Microsoft defines it as:
"Microsoft Power Platform CLI is a simple, one-stop developer CLI that empowers developers and ISVs to perform various operations in Microsoft Power Platform related to environment lifecycle, authentication, and work with Microsoft Dataverse environments, solution packages, portals, code components, and so on."
What does this really mean to Pro-Dev App Makers? Look at the features and benefits the CLI provides:
How do these benefits apply to Power Apps Portals? With Power Platform CLI now supporting Portals, Developers can easily download Portal website configuration files to take advantage of:
Let’s explore the possibilities of Portal Support for Power Platform CLI through these four main steps:
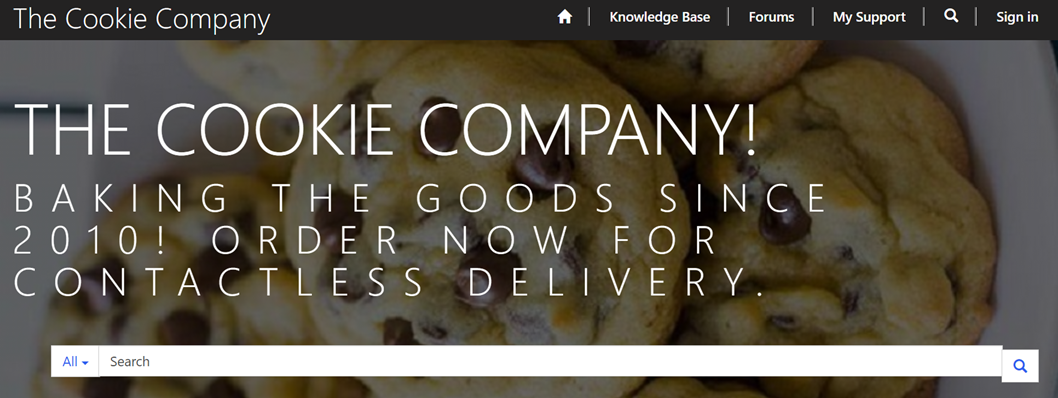
Imagine a fictional organization (simply called Cookie Company) that is working with Developers to create and support their Portal website. As a cookie baking and delivery organization, Cookie Company uses Power Apps Portals and Microsoft Dataverse to operate their business online.
Let’s make the following assumptions about Cookie Company and their Dataverse environments:
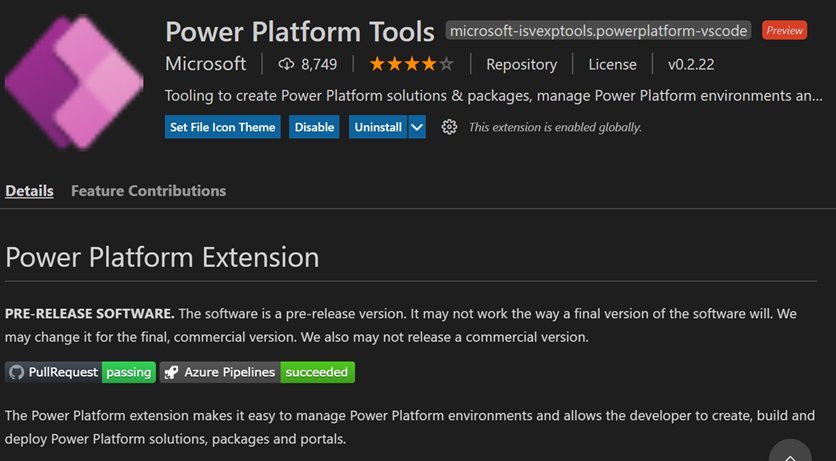
To get started on this journey with Cookie Company, Developers should first install the latest version of Power Platform CLI on the machines where they will perform local development using Visual Studio Code. This can be done by navigating to View > Extensions in Visual Studio Code. Search for Power Platform Tools and install the extension.
Next, let’s navigate to Azure DevOps to create our Build Pipelines. Let’s start with Portal To Source Control.
Create a new Pipeline in Azure DevOps. Use a new Starter Pipeline to generate a YAML template that can be easily modified to define the following pipeline tasks:
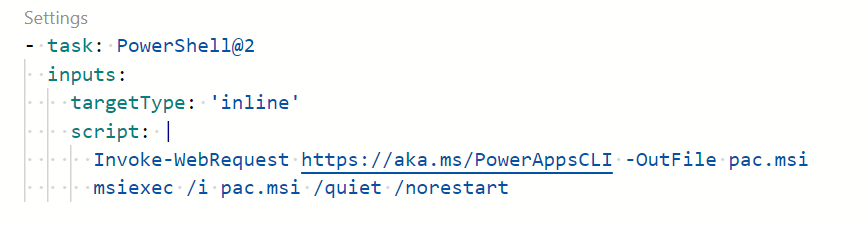
1. PowerShell Task
Used for installing the Power Platform CLI on the Agent VM.
2. PowerShell Task
Used for authenticating to Dataverse and Downloading Portal website configuration files via CLI

3. Command Line Task
Standard commands for commit and push Portal website configuration files to Git repository
4. Publish Pipeline Artifacts
Publishes artifact of latest Portal website configuration files for use in Release Pipeline
While editing the Pipeline, define the following variables using your App Registration from Azure Active Directory:
Be sure to save your changes, then continue building the next pipeline.
The Source Control to Portal Build Pipeline is built following similar steps to the previous Build Pipeline, however the big difference is that this time instead of Downloading Portal configuration files, we will be uploading to Dataverse.
Create another Pipeline in Azure DevOps using the Starter Pipeline template. Define your variables like before, but this time, define the following tasks:
1. PowerShell Task
Used for installing the Power Platform CLI on the Agent VM (same as previous pipeline)
2. PowerShell Task
Used for authenticating to Dataverse and Uploading Portal website configuration files via CLI

Be sure to save the changes to Source Control to Portal pipeline.
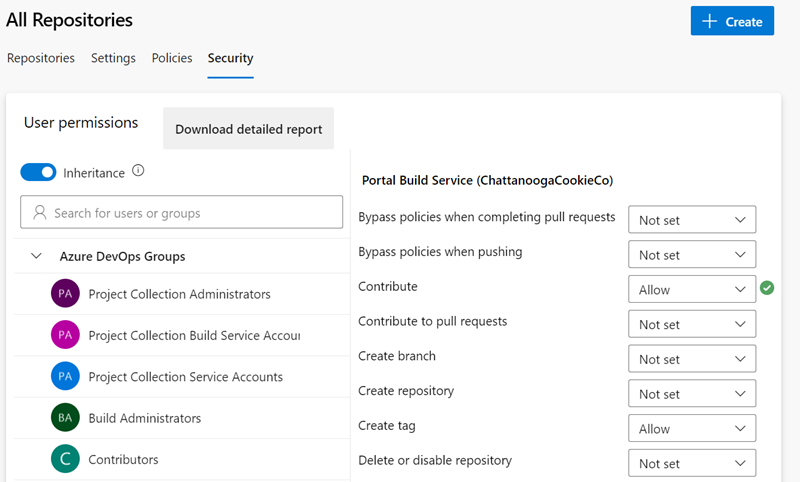
We do have to provide the Build Service the necessary permissions in Azure DevOps to interact with our Repository from Pipelines.
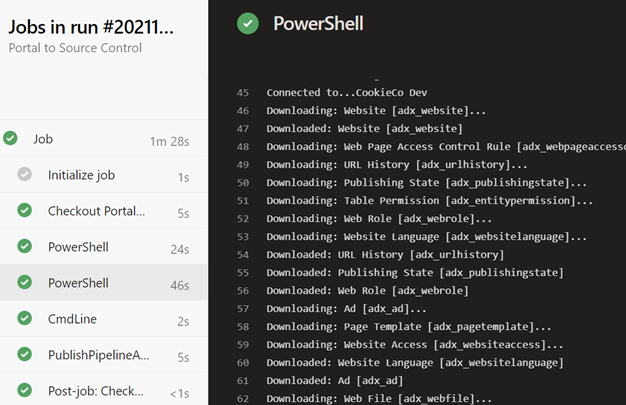
With the Build Service permissions in place, run the first Build Pipeline – Portal To Source Control. This will download the Portal website configuration and do an initial push to the Git repository. In our testing, this pipeline takes under 2 minutes to execute. With a successful pipeline execution and the Portal website configuration files now in Source Control, we can continue with Portal Development.
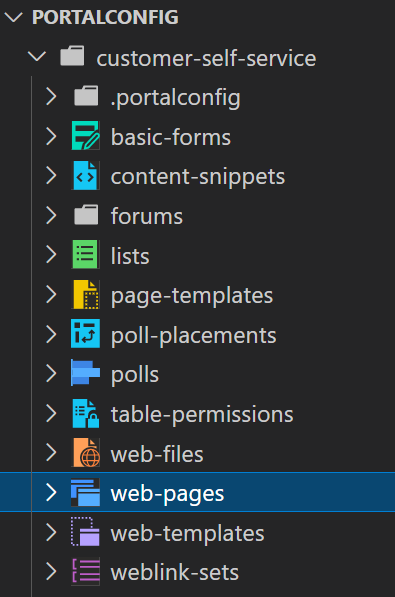
Developers can now clone the Git repository in Azure DevOps using Visual Studio Code. This will make a copy of the Portal Configuration files from the Git repository on the developer’s local machine. Developers can open this folder using Visual Studio Code to see the Portal Configuration file structure.
Developers can make necessary changes to any of the following via Visual Studio Code:
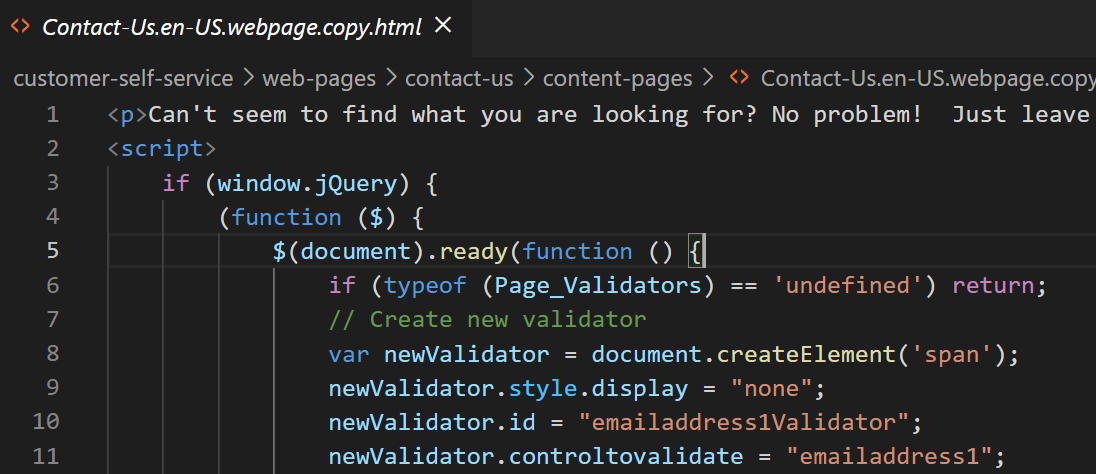
Once these customizations are saved locally, Developers can use the Source Control integration within Visual Studio Code to commit and push all changes back to the Git repository.
After the successful commit and push, run the Source Control to Portal pipeline. This will upload the changes included in the latest commit back to the Portal in the Dev environment, where Developers will need to Sync Configuration in the Power Apps Portal Editor (or clear the Portal website cache) to begin their validation and unit testing of the Portal website.

After validation has taken place in Dev, we are ready to deploy to the Test environment. Run the Portal to Source Control pipeline one final time to get the latest configuration from the Portal website and publish a release artifact.

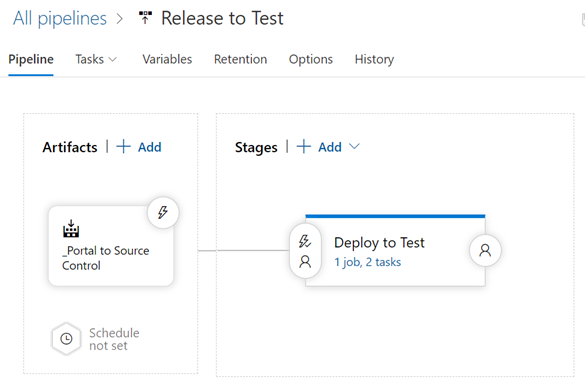
Now that our customizations and latest changes are published to an artifact in Azure DevOps, let’s use that artifact for creating a Release Pipeline called Deploy to Test.
Navigate to Azure DevOps and create a new Release Pipeline. Start with an empty job, then define the artifact we previously published when running the Portal to Source Control pipeline.
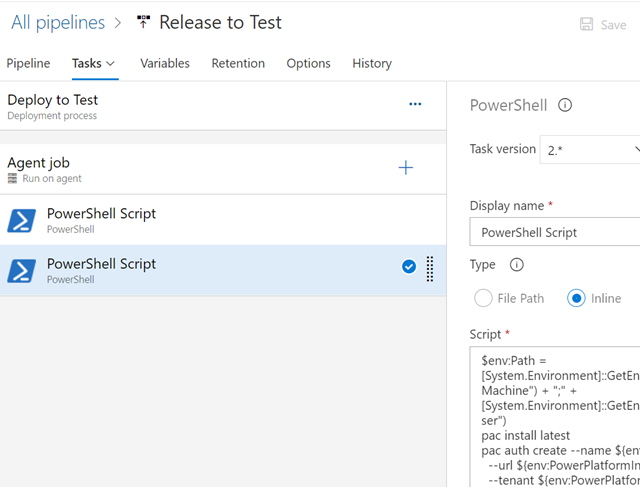
This release pipeline only needs 1 stage. Similar to our previous Pipelines, add the following tasks:
1. PowerShell Task
Used for installing the Power Platform CLI on the Agent VM
2. PowerShell Task
Used for authenticating to Dataverse and Uploading Portal website configuration files via CLI
Add environment variables to the task (much like we did in the Build Pipelines). Be sure to use the values for your target environment (Test or Prod). Save your changes and create a new Release in Azure DevOps to trigger the Deploy to Test release pipeline.
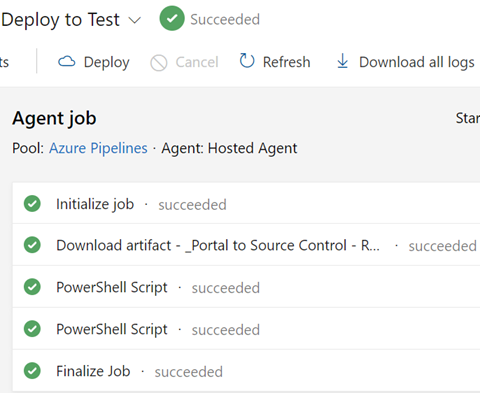
After successful execution, Developers will need to Sync Configuration (or clear Portal website cache) in the target environment to see the latest changes on the website. In our testing, we were able to successfully validate changes in a Test environment. You can also easily expand on this Release Pipeline to add additional targeted deployments, such as targeting the Production environment.
Note that Portal Support for Power Platform CLI is on its initial release, and with that come some limitations. The following are limitations encountered in testing, or highlighted in Microsoft’s documentation:
Portal Support for Power Platform CLI makes Portal Development faster by providing a local development experience, and when partnered with Azure DevOps Pipelines, provides an avenue for implementing Continuous Integration. This quick demo did not go into all the possibilities with this approach – consider the possibilities with Branching strategies in source control or implementing schedules and triggers on Pipelines for automated execution (and less manual work!)
Have fun, and Happy Coding!


