How Microsoft Power Platform is helping to modernize and enable...
In this webinar, our experts showcase a variety of demo use cases of how different components of the...
Background
In a Power Automate (flow), we can limit when the flow is triggered using several different methods. This blog post will highlight two methods a maker can employ to limit flow runs using trigger conditions. Using trigger conditions allows a maker to create multiple conditions that must be met for a flow to be triggered. Please note that if a flow’s trigger conditions are NOT met, the flow will not be triggered, and no run history will be logged.
Option 1 – Filter rows conditions on the trigger action:
A maker can limit a flow’s triggering via the Filter Rows property under Advanced Options of the trigger step.
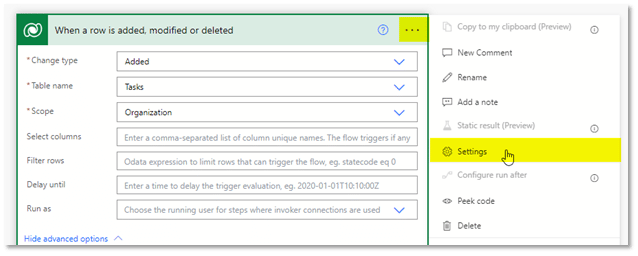
Here we use an oData query statement to control when the flow triggers. This option can be difficult to implement and usually only allows a single filter. Using an AND or OR operator to combine conditions will most likely not work. Therefore, let’s explore an alternative and easier method for combining multiple trigger conditions, described in Option 2 below.
Option 2 – Set trigger conditions on the trigger action:
A maker can limit a flow’s triggering via the settings of the trigger component. Please see the step-by-step instructions below.

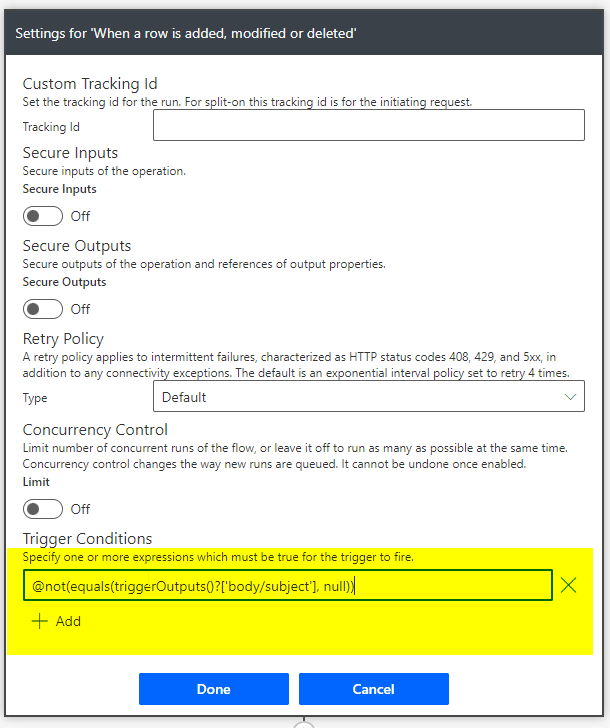
If you have multiple filter conditions to add, you can click the +Add button and repeat steps 3-4 above to generate the properly formatted conditions. However, if you need to have OR logic, you need to put that in one line like this: @OR(test1,test2,test3). Note that we drop the leading @ of each string and put that at the beginning.
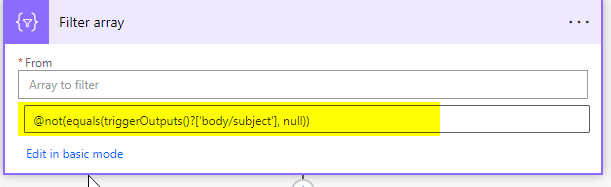
For example, if we wanted to have our trigger filter if a task
our syntax would look like this (carriage returns added for readability):
@or(@greaterOrEquals(triggerOutputs()?['body/scheduledend'], utcNow()),
equals(triggerOutputs()?['body/subject'], null),
not(equals(triggerOutputs()?['body/statecode'], 2)))
Finally, once you have completed the setup of the trigger conditions you can delete the filter array option and complete any additional steps required for your flows use case.