
How Microsoft Power Platform is helping to modernize and enable...
In this webinar, our experts showcase a variety of demo use cases of how different components of the...
We were recently working with a customer on portals, and we had the requirement to show in the portal only comments directed to the logged-in portal user. You might think easy-peasy – we just need to limit relevant Table Permissions to contact scope! You’d be wrong, as it turns out.
If you set up the ‘Activity pointer’ and ‘Portal Comment’ Tables to Contact scope, what you get is the button to add the portal comments, but nothing will show on the subgrid. Even an added portal comment won’t appear on the subgrid below.

Figure 1. When ‘Activity pointer’ and ‘Portal Comment’ Tables to Contact scope, they will not show any record.
So, we went scratched our heads and went back to the drawing board. Here’s how we ultimately achieved this requirement:
Step 1. Set the ‘Portal Comment’ and ‘Activity pointer’ Table permissions to Parent scope to the related record (in this example Case was used), as shown below:

Figure 2. Parent Table permissions added to Case an’ Activity Pointer’ and ‘Portal Comment’ Tables.
That will show any ‘Portal Comment’ that has been added to the case, even if was made by or to another user not logged-in to the portal.
In this example a ‘Portal Comment’ was made to another user (A Datum Fabrication). This portal should not be visible if we want to have only the ones made by or to the Contact logged in.
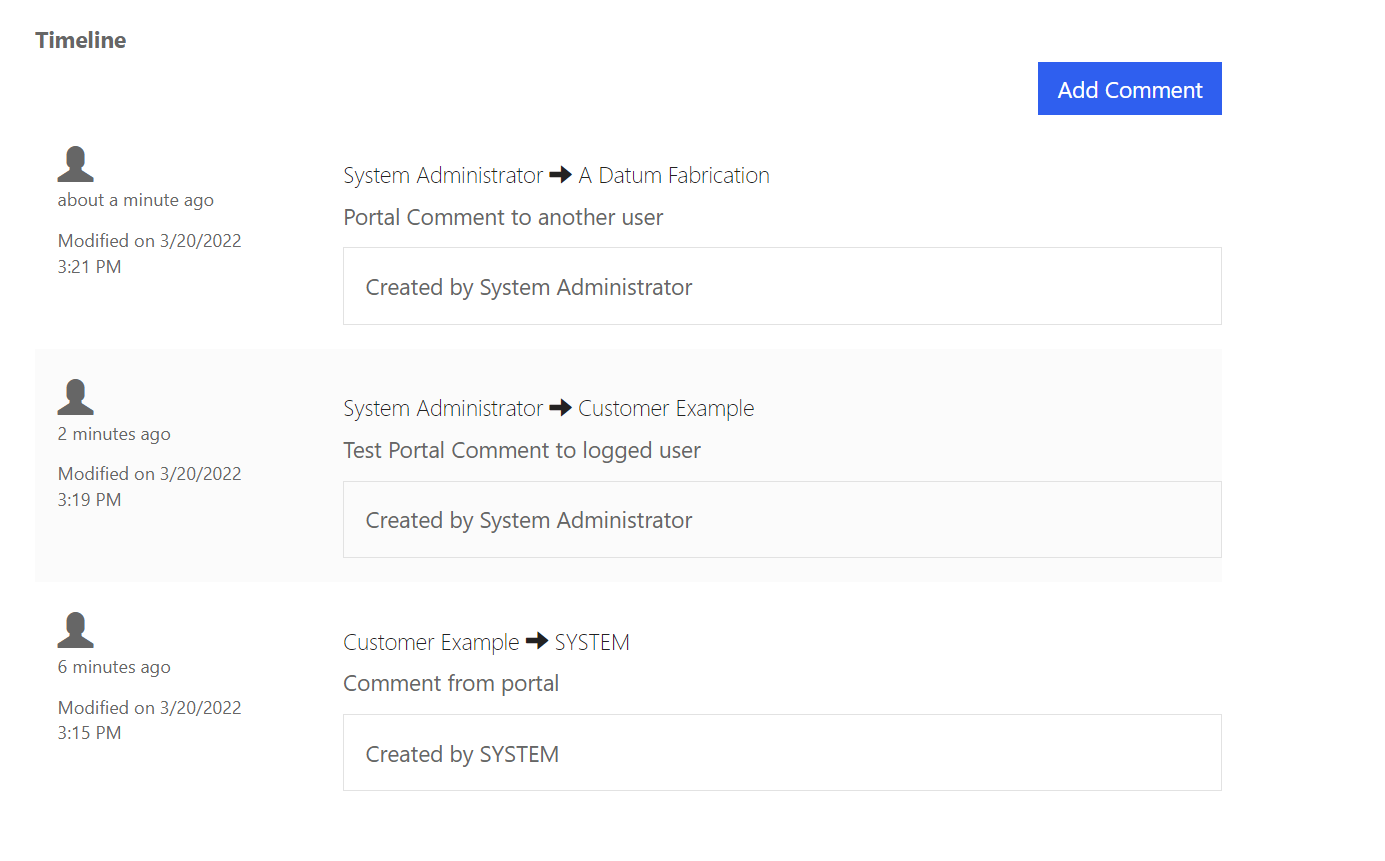
Figure 3. Portal Comments with Table Permissions set to Parent scope.
Step 2. Create a Dummy Contact record that will become a configuration record on your views. So, make sure that you add that to your Configuration data across your environments.
Nothing needs to be added to this dummy contact. Here, only First and Last Name have been added:
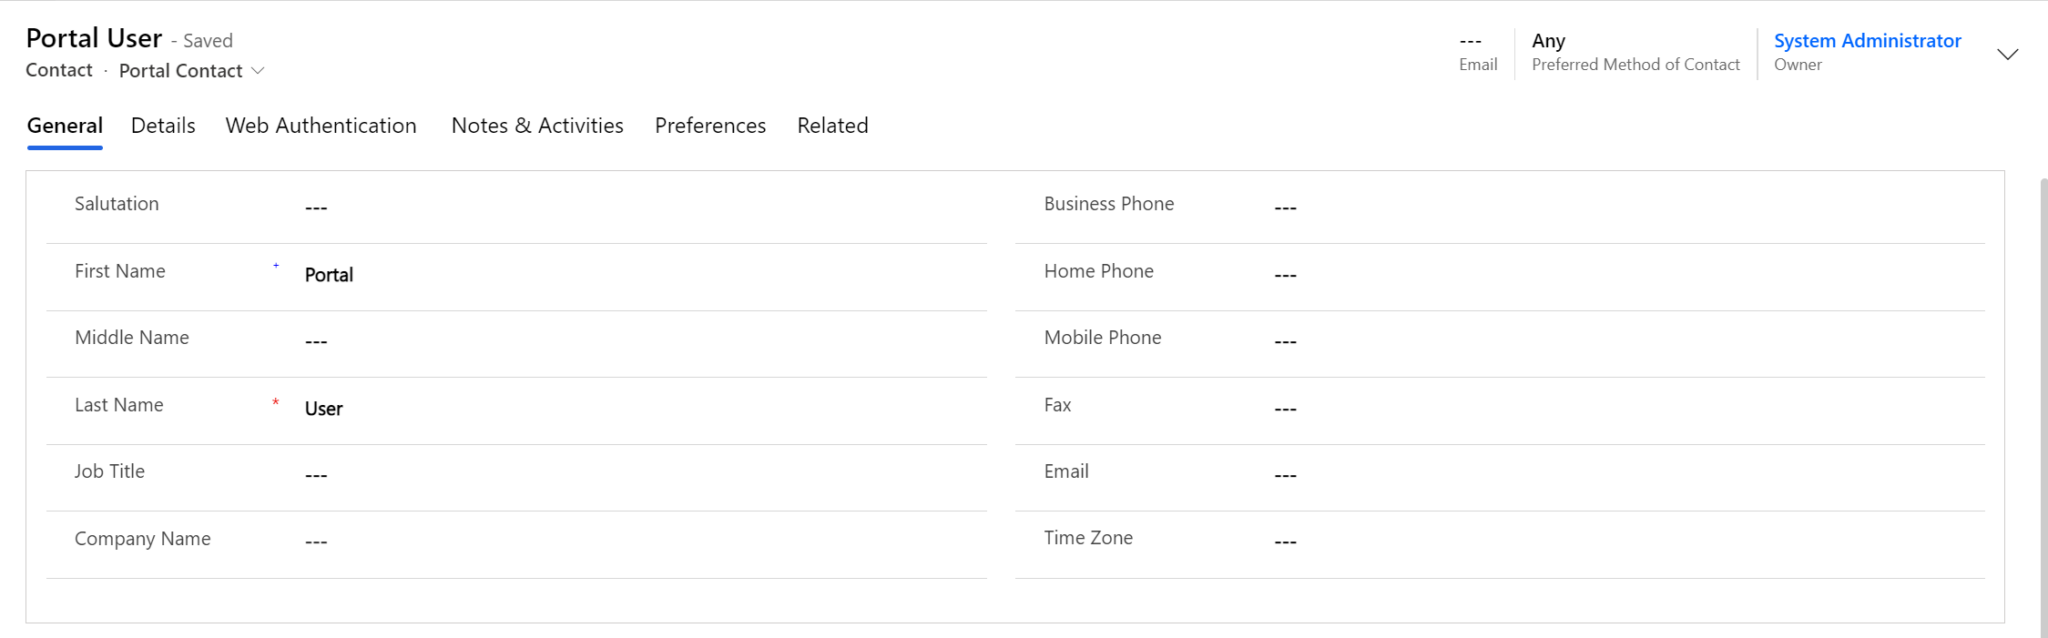
Figure 4. Create a dummy contact.
Step 3. Set up the Portal Timeline view on the Activity Table to be the filter when Contact is your dummy contact.
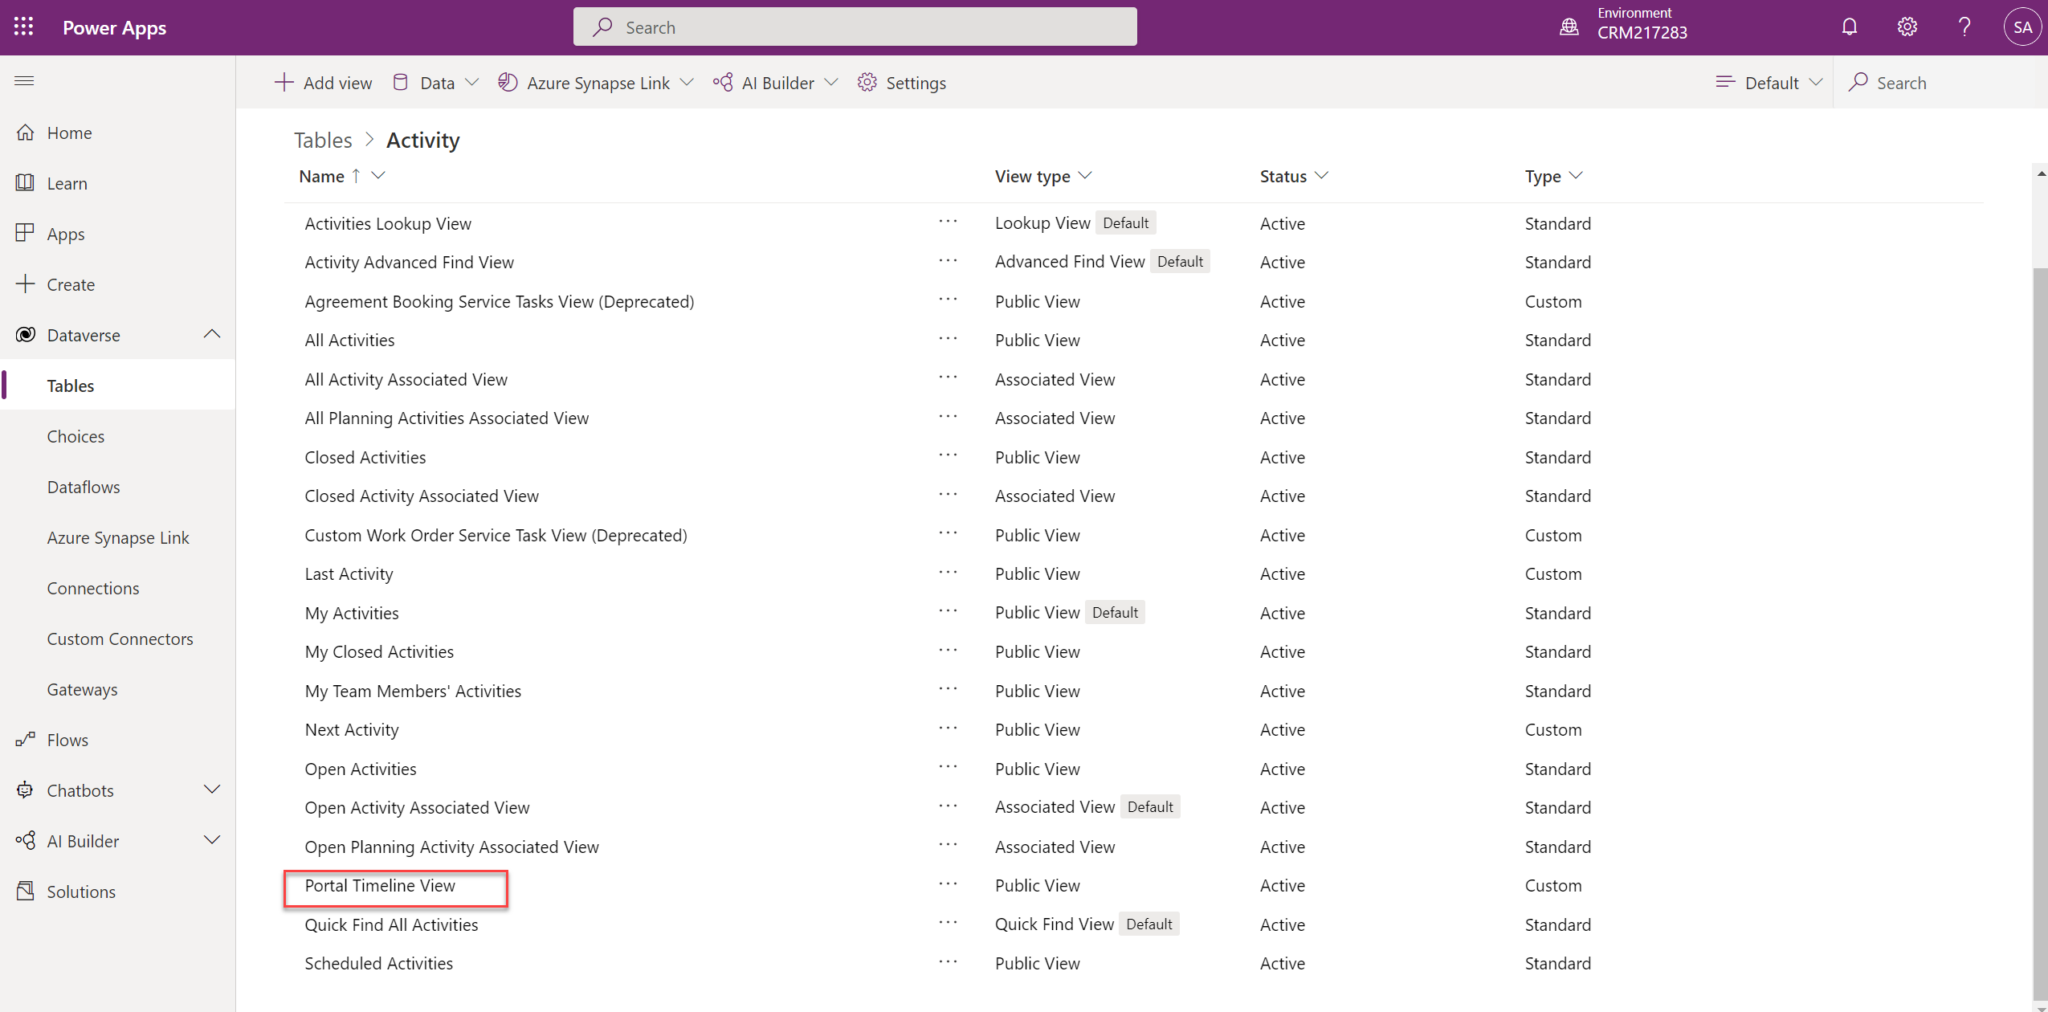
Figure 5. Select the Portal Timeline View.
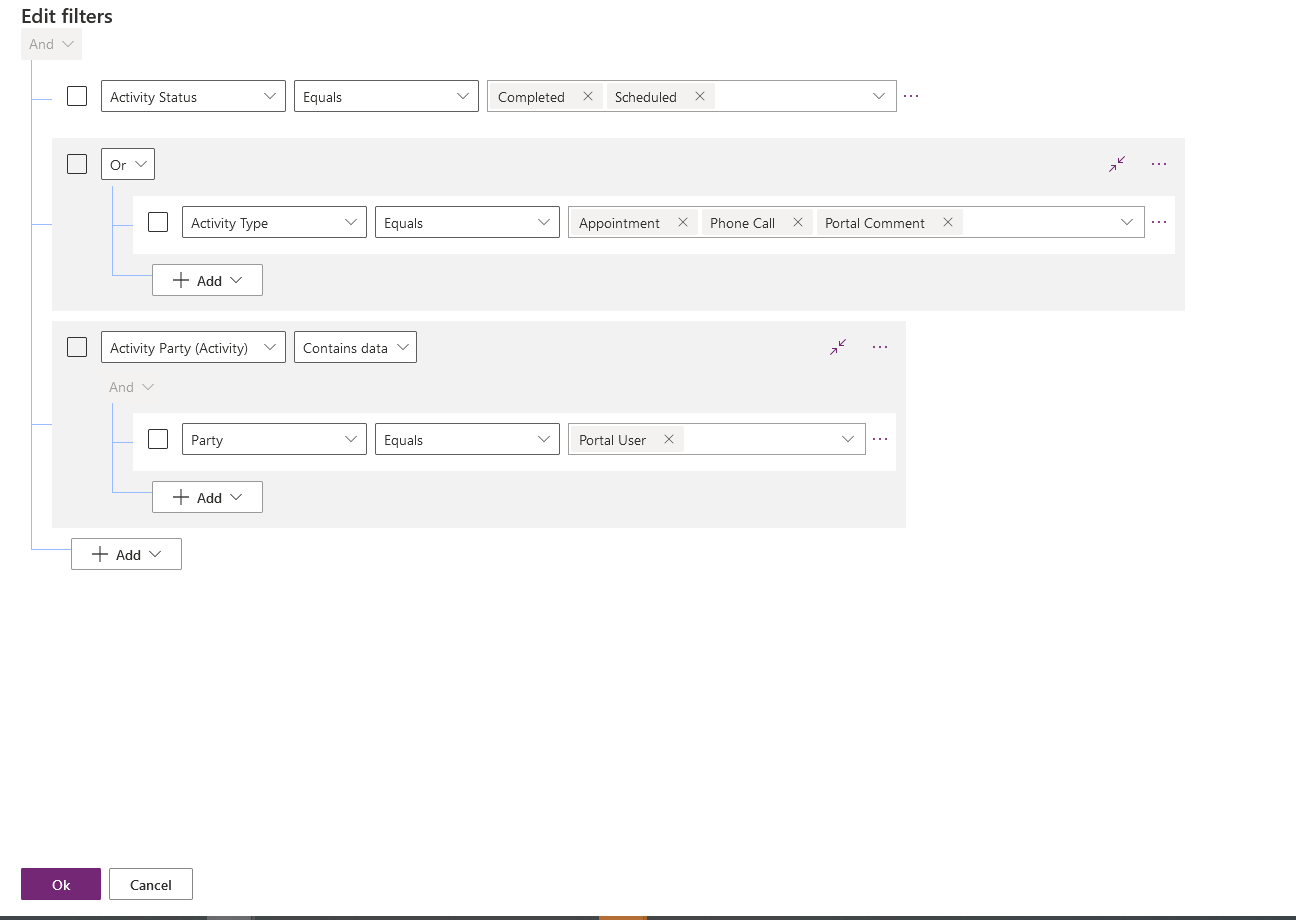
Figure 6. Add a Related table filter on Activity Party where Party is your dummy contact.
Navigate back to the Portal and all the magic is done. Now you have only the ‘Portal Comments’ for the portal that is logged in.
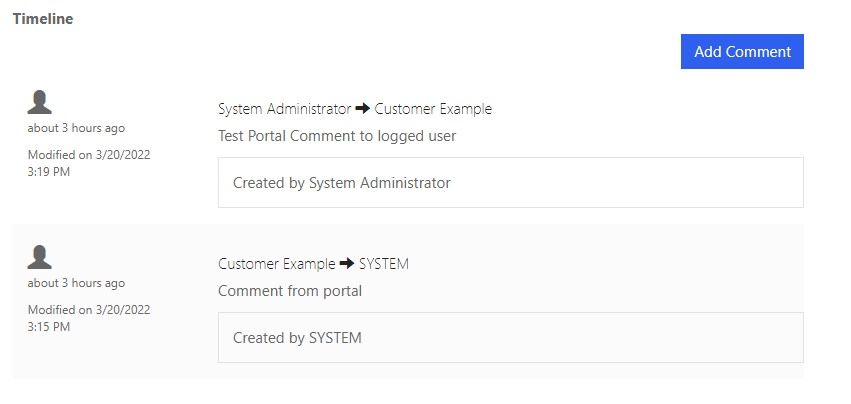
Figure 7. Now only Portal Comments made by or to the logged user will show on the Timeline.
The drawback is that you will limit all Portal activities to only the related logged-in user, but nothing is stopping you from using a subgrid on the form and configuring a view with identical filters rather than the Portal Timeline. Happy Portaling!


