
How Microsoft Power Platform is helping to modernize and enable...
In this webinar, our experts showcase a variety of demo use cases of how different components of the...
This blogpost demonstrates how a maker can implement show/hide logic on a custom ribbon button in a model-driven app based on a user’s security roles. This functionality can be useful if we want to restrict access to a ribbon button that performs sensitive or business critical operations because without the proper security role, a user won’t be able to click the restricted ribbon button to launch the process or execute the logic.
We want to show the ribbon button to only users who have been assigned to “Basic User” security role. Note: While this functionality can be implemented for any security role in your Dynamics 365 instance (custom as well as out-of-box), we will use the Basic User role in this example.

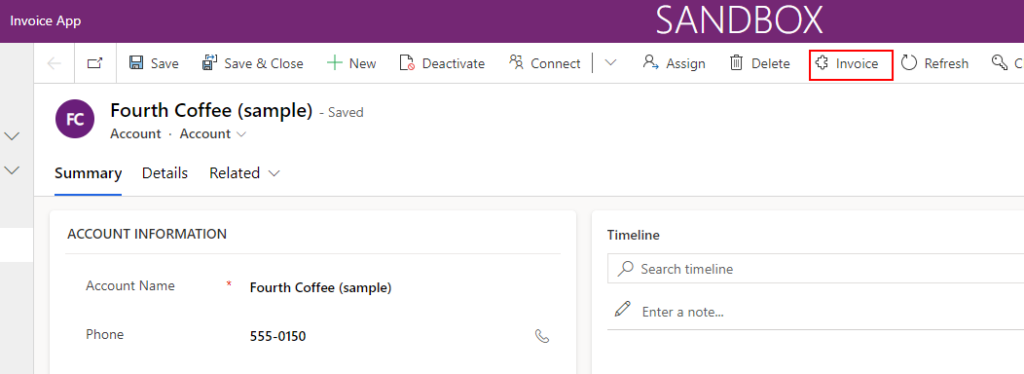
If the logged-in user has been assigned this role, they should be able to see the Invoice button, as shown in the example below. If they have note been assigned the role, they won’t see the button.
JavaScript Code
Here we will use JavaScript code to check the assigned security role of the logged-in user.
Create a new web resource in your solution and add the below piece of code in your JavaScript.
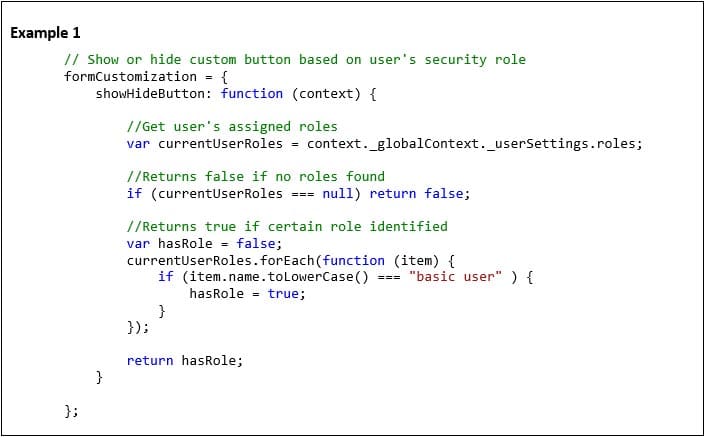
In this code, the Primary Control (context) will be passed from ribbon workbench enable rule.
Also, to get the user’s security roles we have used context._globalContext._userSettings.roles; which returns collection of objects – with GUID and name of each security role that is assigned to the user individually or through a team. We are comparing the role with the name field.
We could also use context._globalContext._userSettings.securityRoles; (which is used to return an array of GUID values of each security role), as illustrated in Example 2 below.
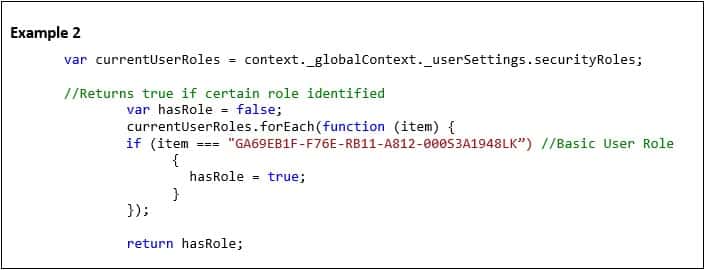
However, we would then need to compare the role with the security role’s GUID – which must be hardcoded and can change in other environments/instances. Since name could remain the same in all instances, it may be easier to utilize context._globalContext._userSettings.roles, as shown in Example 1 above.
Either way, the JavaScript code will return TRUE if user has certain role and FALSE if not.
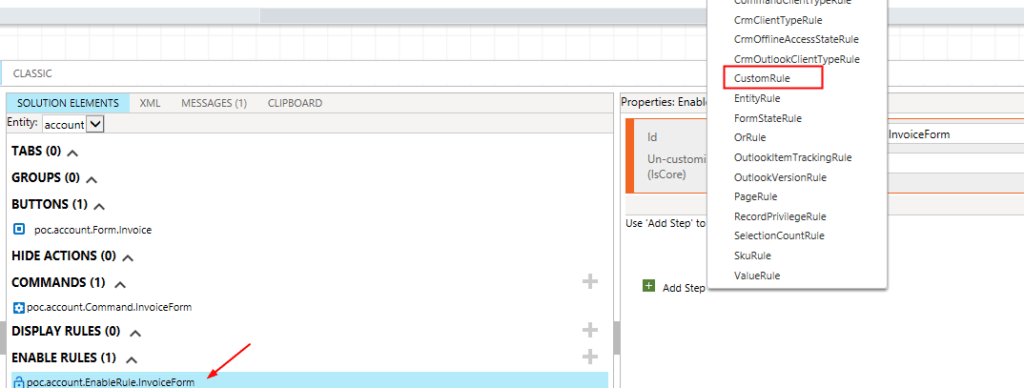
The next step to complete our show/hide functionality utilizes the XRM toolbox. This is an open-source tool that is very useful for CRM and Power Platform development. You may also need to install the Ribbon workbench in your instance of XRM toolbox if you have not already.
In the Ribbon Workbench below is the form Invoice Button on which the “poc.account.Command.InvoiceForm” command is called.
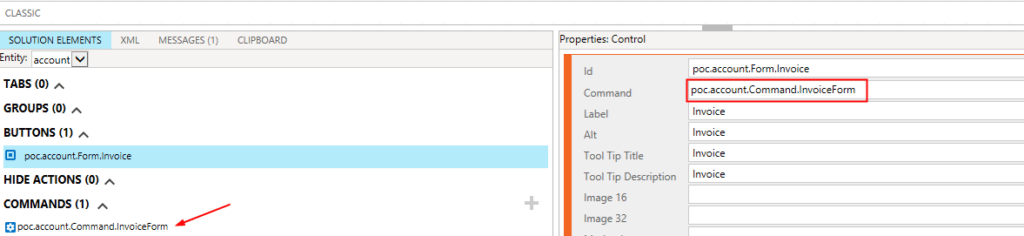
We add a new Enable Rule in which we add a CustomRule to call our JavaScript code and pass the record’s PrimaryControl.
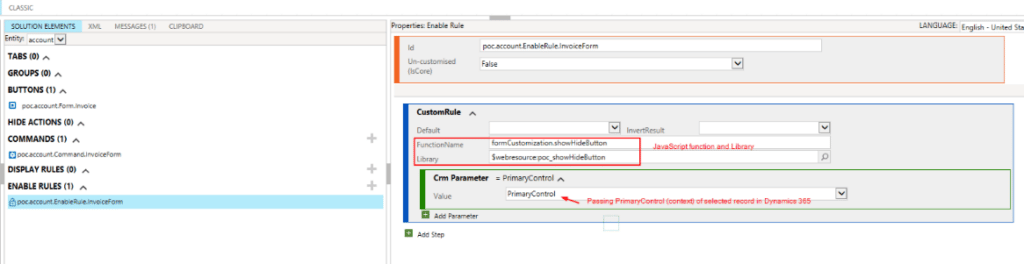
The CustomRule we have applied will call the JavaScript function and is expected to receive either true or false based on the code.
If TRUE – button will be enabled
If FALSE – button will not be enabled
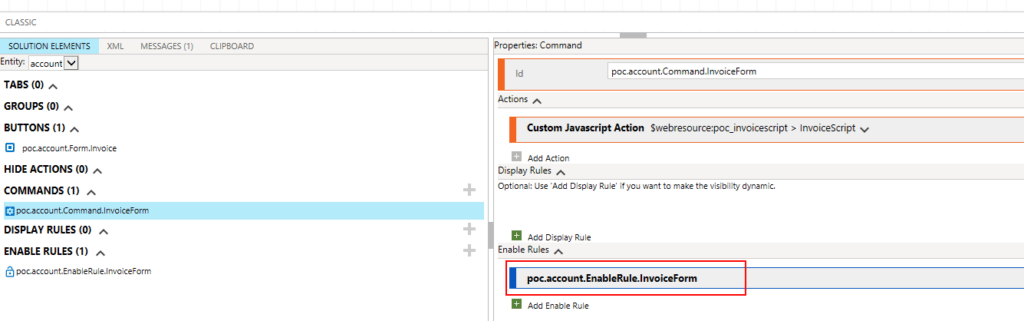
Make sure to add this Enable Rule to the command (which is in-turn attached to the Ribbon Button itself).
Hope this has been helpful. For more Dynamics 365 tips and tricks, follow our blog! Happy Dynamics 365'ing!


