How Microsoft Power Platform is helping to modernize and enable...
In this webinar, our experts showcase a variety of demo use cases of how different components of the...
In today’s post, we will discuss ingesting Dynamics 365 Contacts in Customer Insights. We focus on Audience Insights with Individual Consumers, as well as an architecture for ingesting data. The steps are as follows:
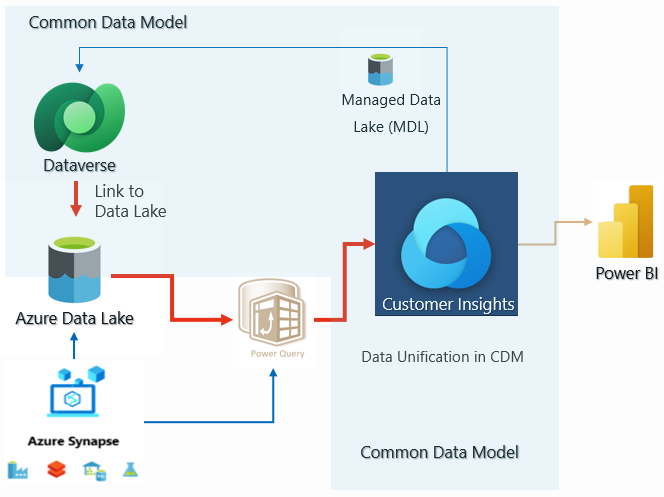
Dynamics 365 data is in Dataverse. Power Query is used to ingest data from external data sources to Customer Insights. This means that there are several ways to ingest data. We use Azure Data Lake Gen2 as data source connector to ingest Dynamics 365 data to Customer Insights. We consider processed data before ingesting data to Customer Insights for optimized and for better refresh performances.
Power Platform has a feature to export data from Dataverse to Azure Data Lake gen2 in Azure Synapse Link. In this process, we can choose tables/entities in Dataverse to export ADL gen2 in csv files. Data from Dataverse is automatically refreshed every hour. We can also use the ADL gen2 data to develop Power BI reports in Workspaces in Azure Synapse if required.
Data flow in red arrow for this blog example:
Let’s start ingesting Dynamics 365 data from Dataverse to Customer Insights! We use a Dynamics 365 free trial environment and a free trial Customer Insights environment. The user is an administrator with Global admin role assigned. We export sample contacts in Contact table and use the columns including Contact Id, Full Name, First Name, Last Name, Email, Phone, Gender, Address Street 1, City, Postal Code, State and Country.
We create a storage account with Azure Data Lake Gen2 where location is the same as the Dynamics 365 tenant lives. We can check the location in a process of creating the Azure Synapse Link after clicking the “New link to data lake” button.
Important: the storage account must have a role assigned before creating the link from Dataverse to the Azure Data Lake gen2. We assign “Storage Blob Data Contributor” to the global admin user who created the storage account.
In this example, East US is the location where the storage account must be created in.
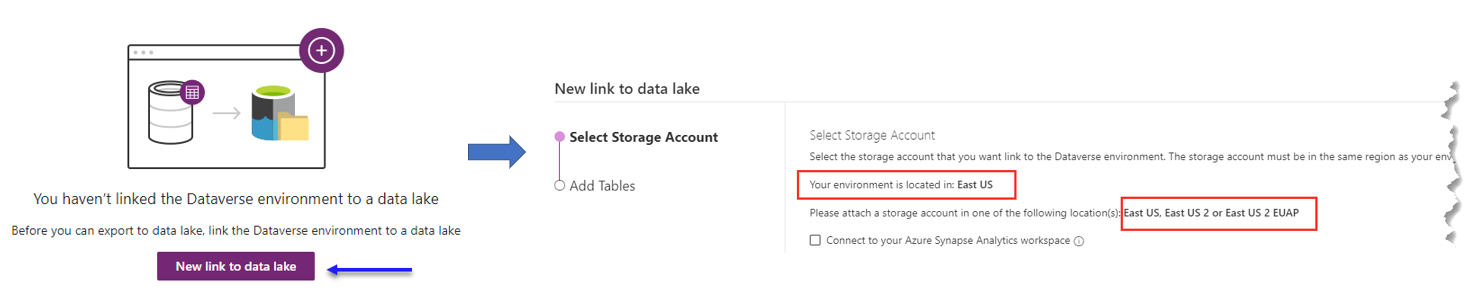
Please note that we have an option to select “Connect to your Azure Synapse Analytics workspace” to link to an Azure Data Lake in Synapse workspace. However, in this case, we export data from Dataverse to the Azure Data Lake Gen2 created in the image below.

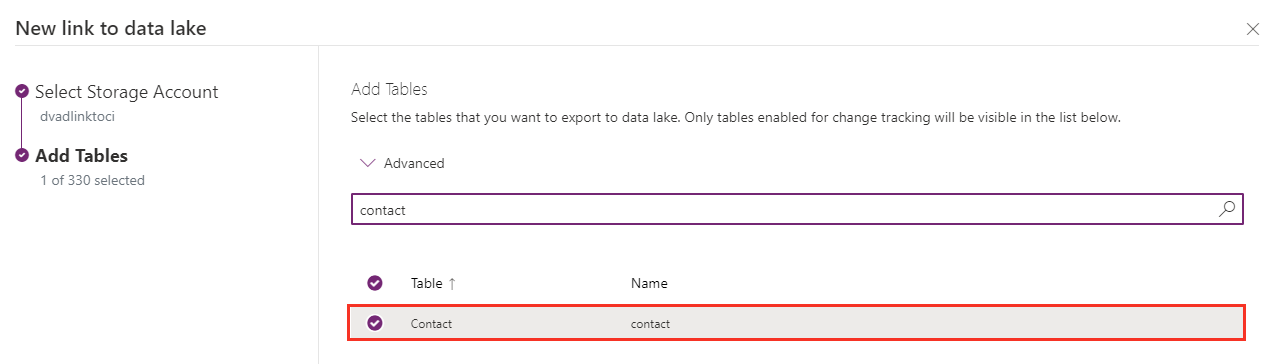
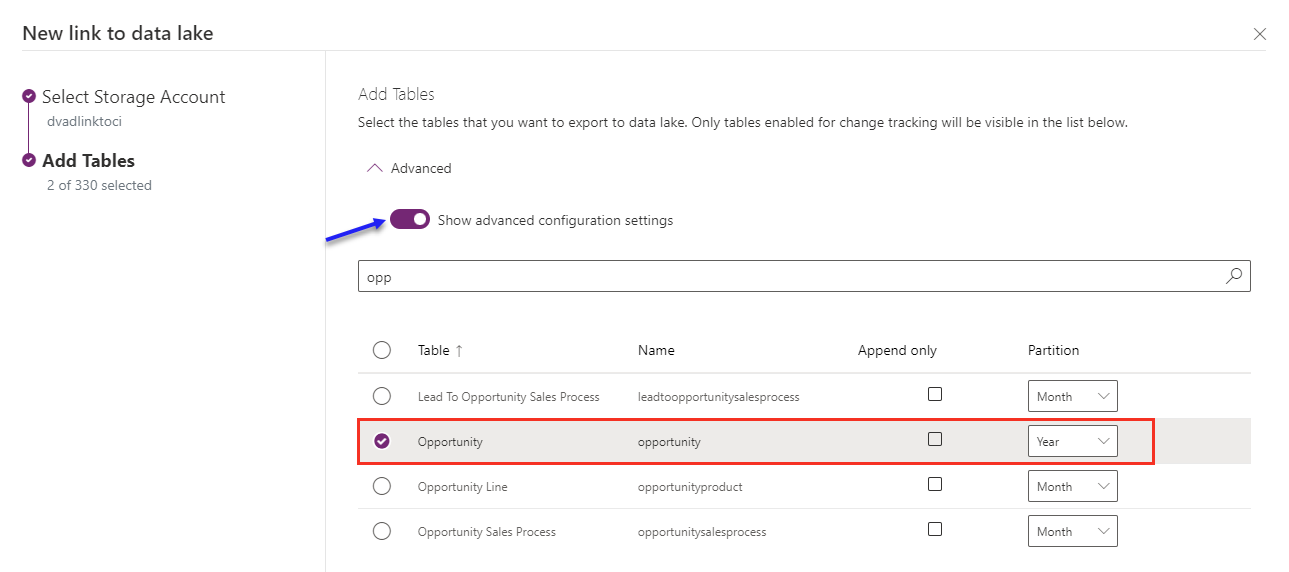
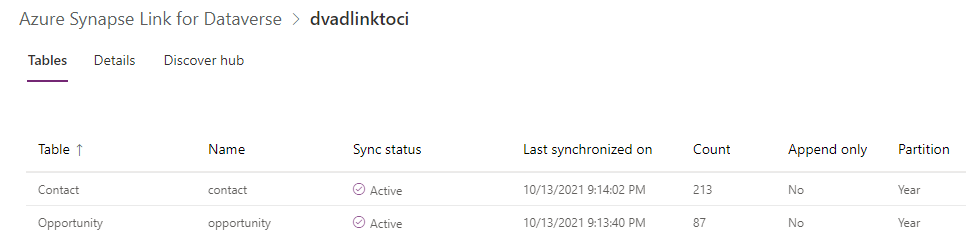
We select entities/tables in Dataverse. We are going to export contacts as customers, and opportunities as activity data for Customer Insights. We have an advanced setting where we can select partitions monthly or yearly. In this case, we use a small set of opportunity records, and the records are less frequently refreshed so that select yearly. If using incremental and frequent refresh, then it is recommended selecting monthly partitions.
Once clicking “Save” button, a file system is created.
We can also see in the Azure Storage Account where two containers are created.
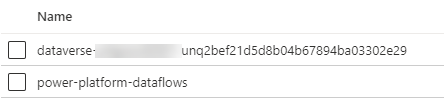
“dataverse-xxxxx” container includes data from Dataverse.
Resources:
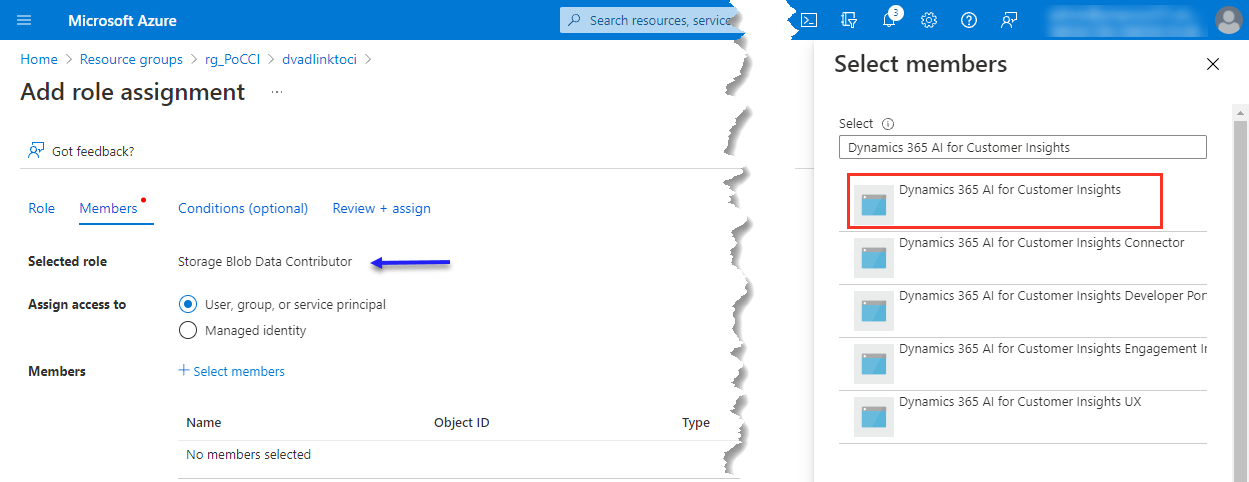
In this step, we are going to configure a Permission that the Customer Insights application can access to the storage account where the Contact and Opportunity records are exported.
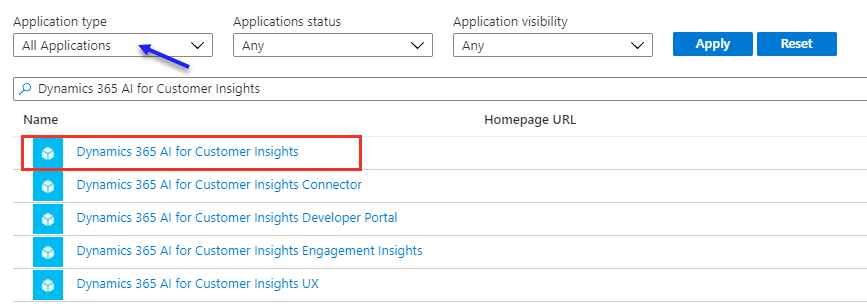
We register Customer Insights as an application. Let’s go to Azure Active Directory and Enterprise Applications. Let’s search for “Dynamics 365 AI for Customer Insights” after changing to “All Applications” in the Application type.
We are going to assign “Storage Blob Data Contributor” role to the application (Service Principal) in the storage account so that the Customer Insights application can access the contact and opportunity records in the Azure Data Lake gen2.
Resource:
We are going to ingest records from Azure Data Lake Gen2 to Customer Insights via Power Query. The “Azure data lake storage” option in Customer Insight worked when ingesting data; however, we experienced errors when we match contact records with other contact records in different data sources and also experienced timeout error when refreshing data.
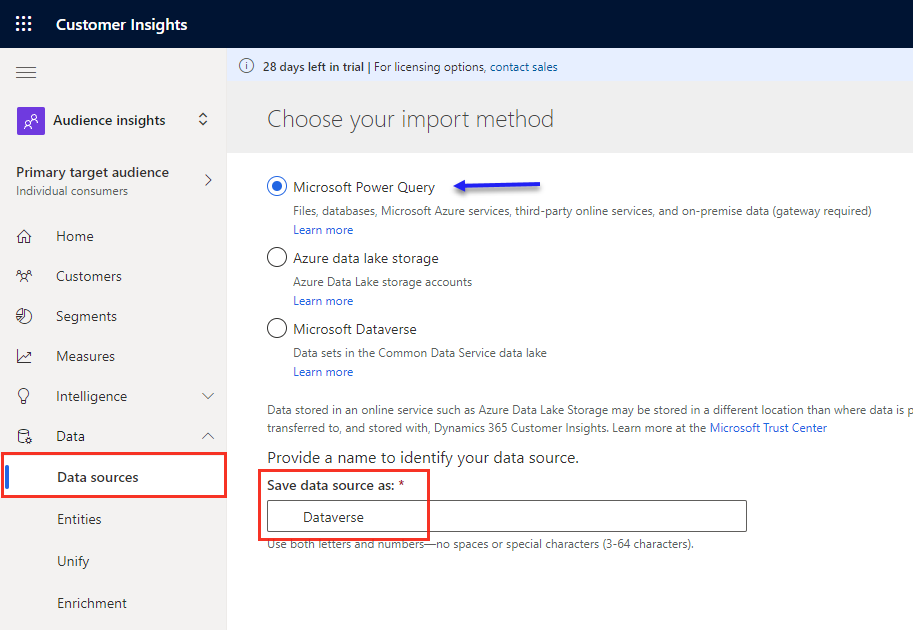
Let’s go to “Data source” in Data in Customer Insights. Click on “+ Add data source” button and select “Microsoft Power Query” We give it a name as “Dataverse.” Click “Next” button.
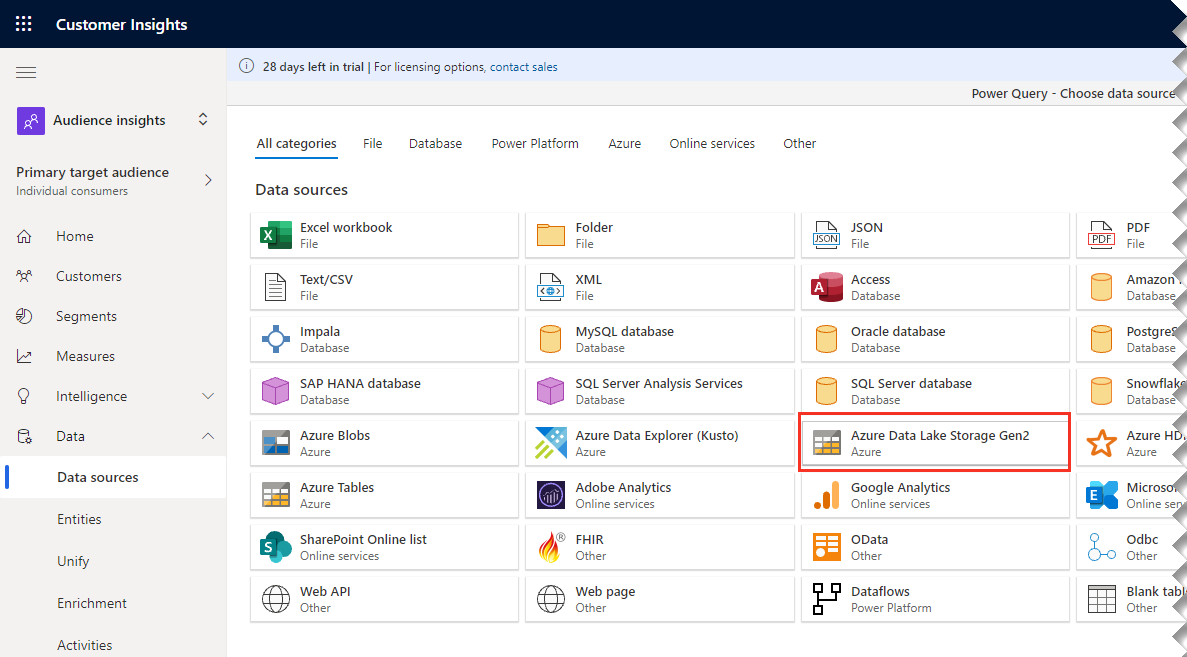
In this example, we select “Azure Data Lake Storage Gen2.”
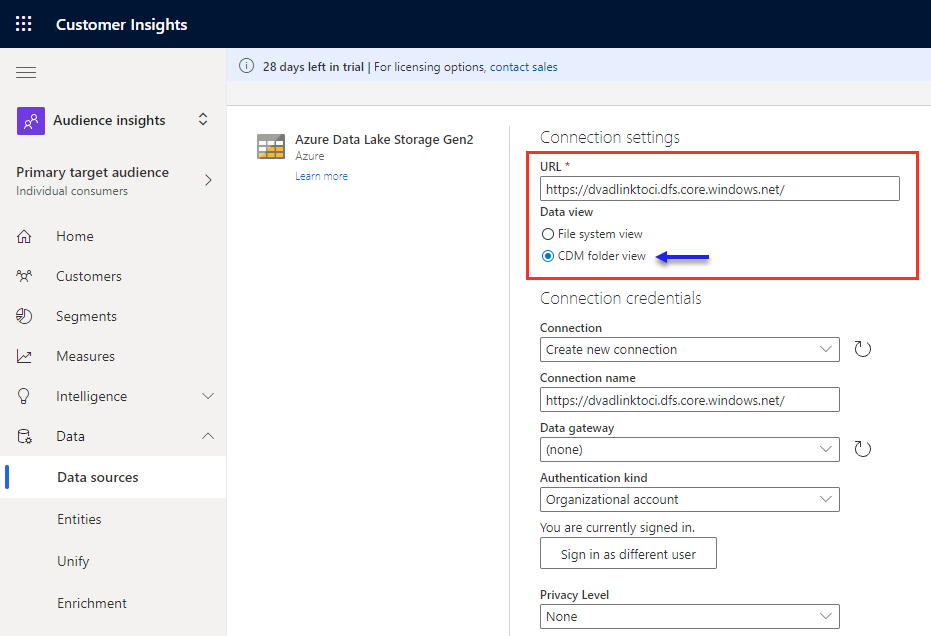
We get the file system endpoint URL in the storage account in Azure Poral and paste it to the “URL” textbox and select “CDM folder view.” Click Next after sign in with your organization account.
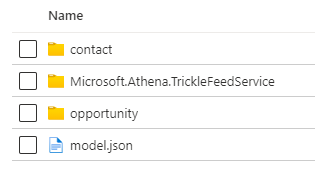
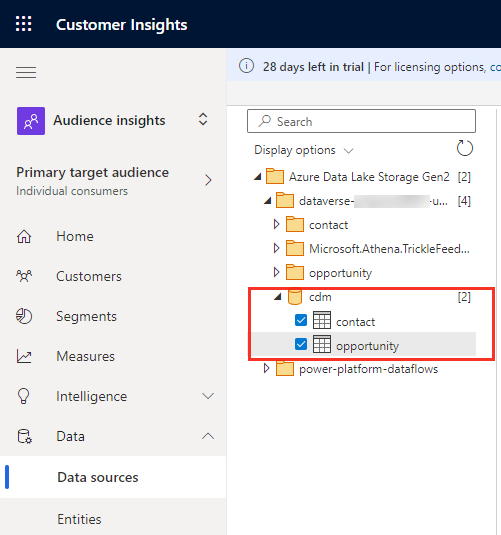
We select entities, “contact” and “opportunity” in cdm folder and click “Transform data.”
We select columns in Contact and Opportunity entities. It is helpful to have an advanced search view open in Dynamics 365 for a contact and an opportunity view to reference field name (not display name) when selecting fields/columns in Power Query. Advance fined views show the schema name of the fields that match in the column list in Power Query.
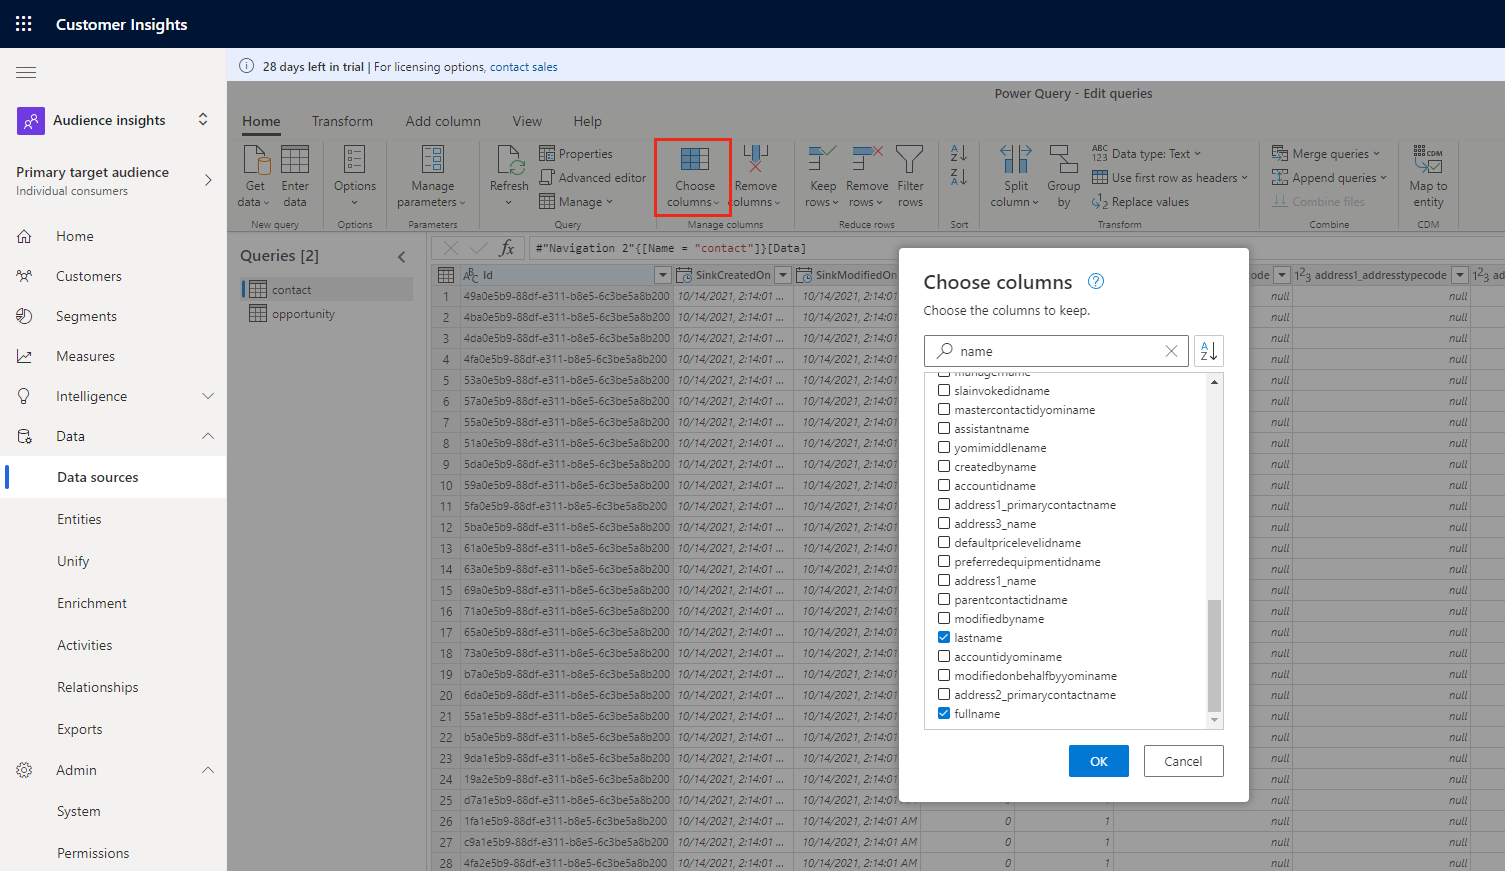
We check the data type. We also create option set values with Conditional Column feature in Power Query. For example, the gender in contact records in Azure Data Lake gen2 is only numbers but no text label.

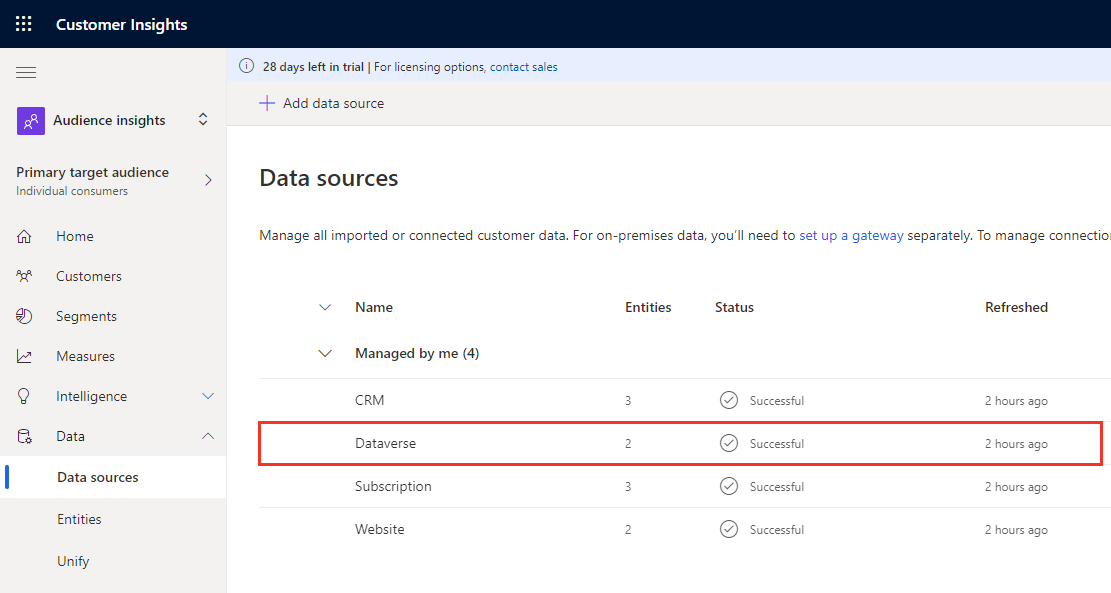
Data is ingested in the “Data sources” in Customer Insights.
We have other contacts from eCommerce systems ingested to Customer Insights. We are going to unify these contacts in Dynamics 365 and the contacts in the eCommerce system. There are same contacts in Dynamics 365 contacts in the eCommerce system.
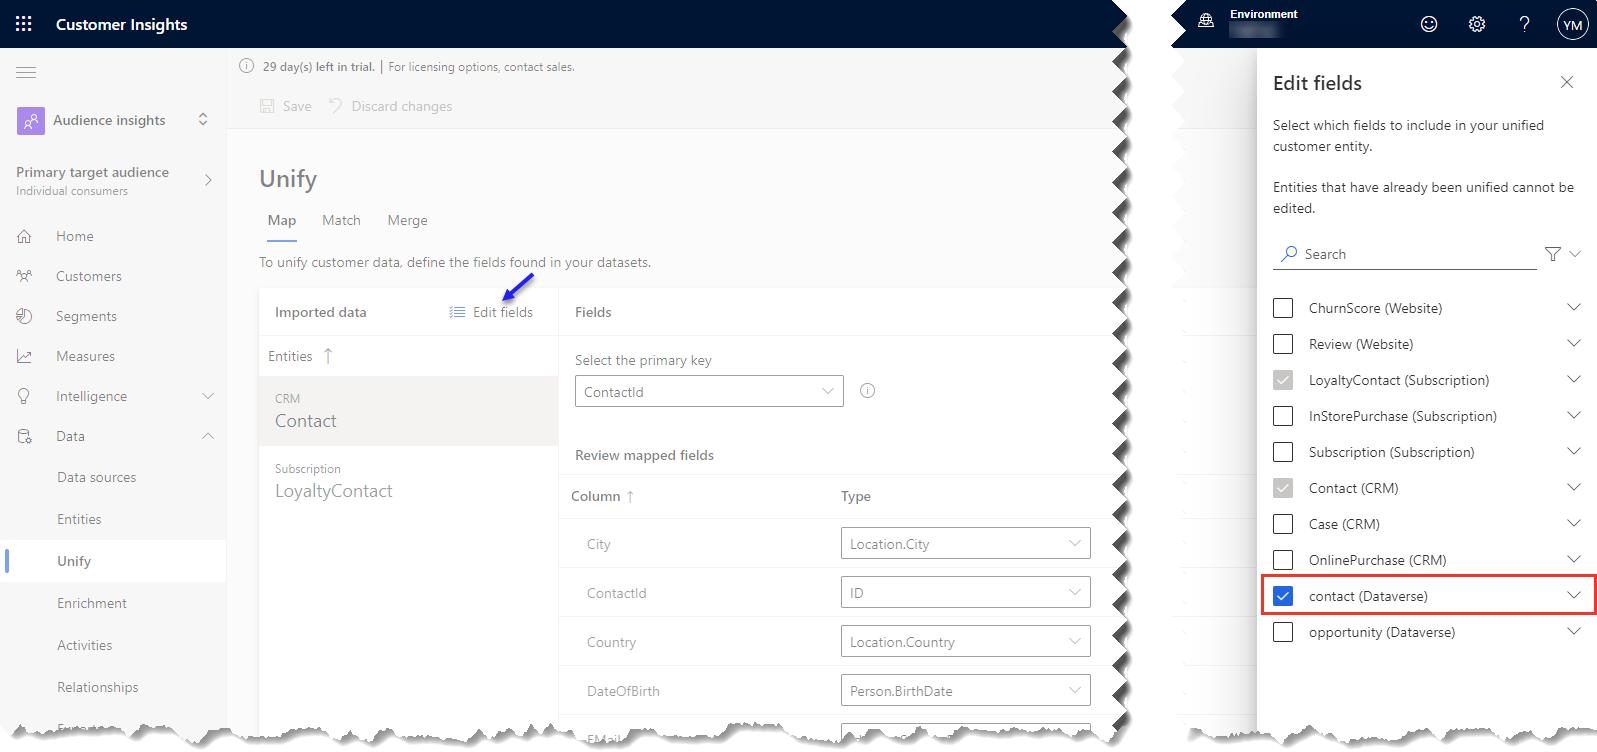
First, we add Contacts in Dataverse to Map area in Unification process. We map the field data type to Customer Insights defined data type.
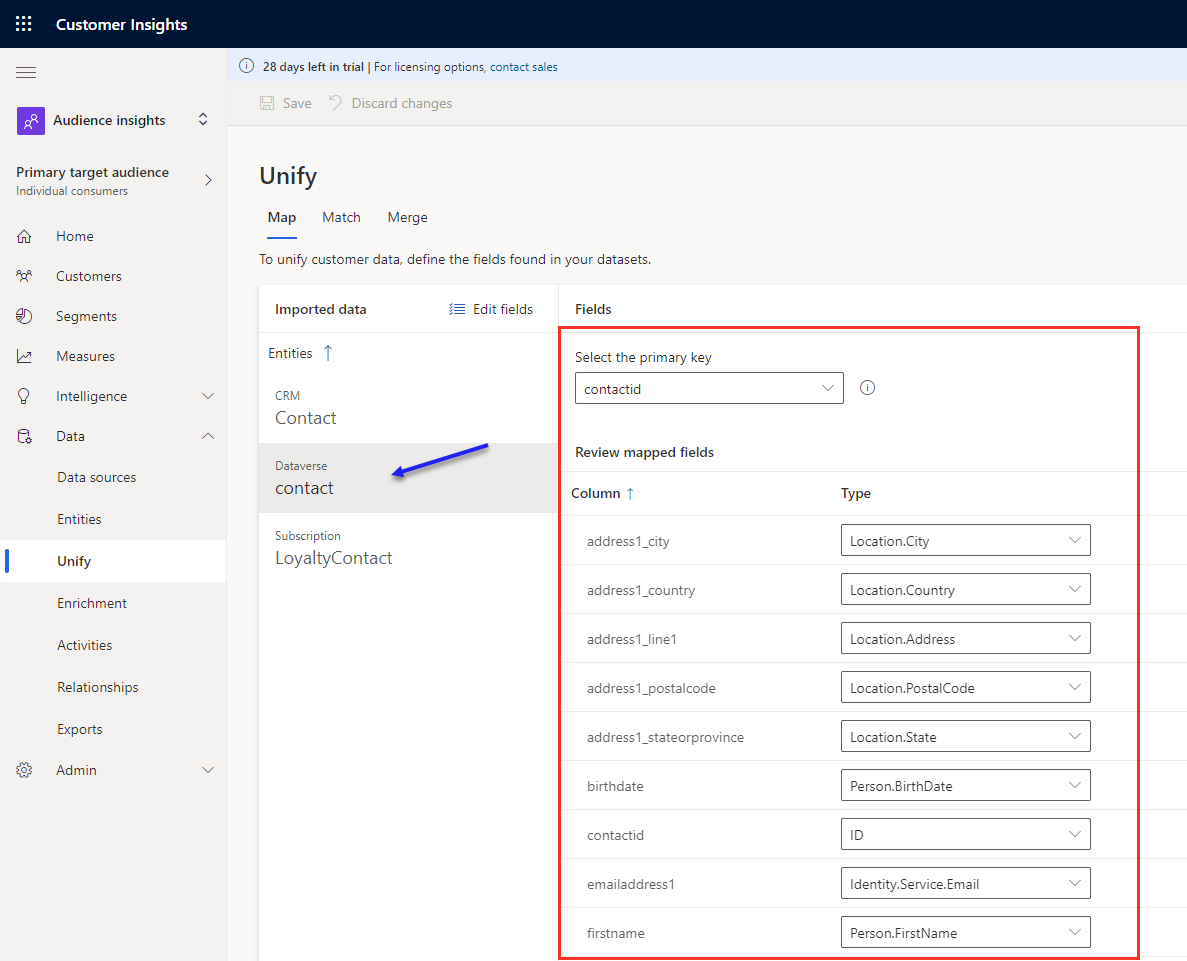
Once mapping is complete, we create a matching rule between contact entity in CRM (primary) and contact entity in Dataverse. We set the same matching rule with fullname fields. We could also add email addresses for matching rule to make it more accurate.
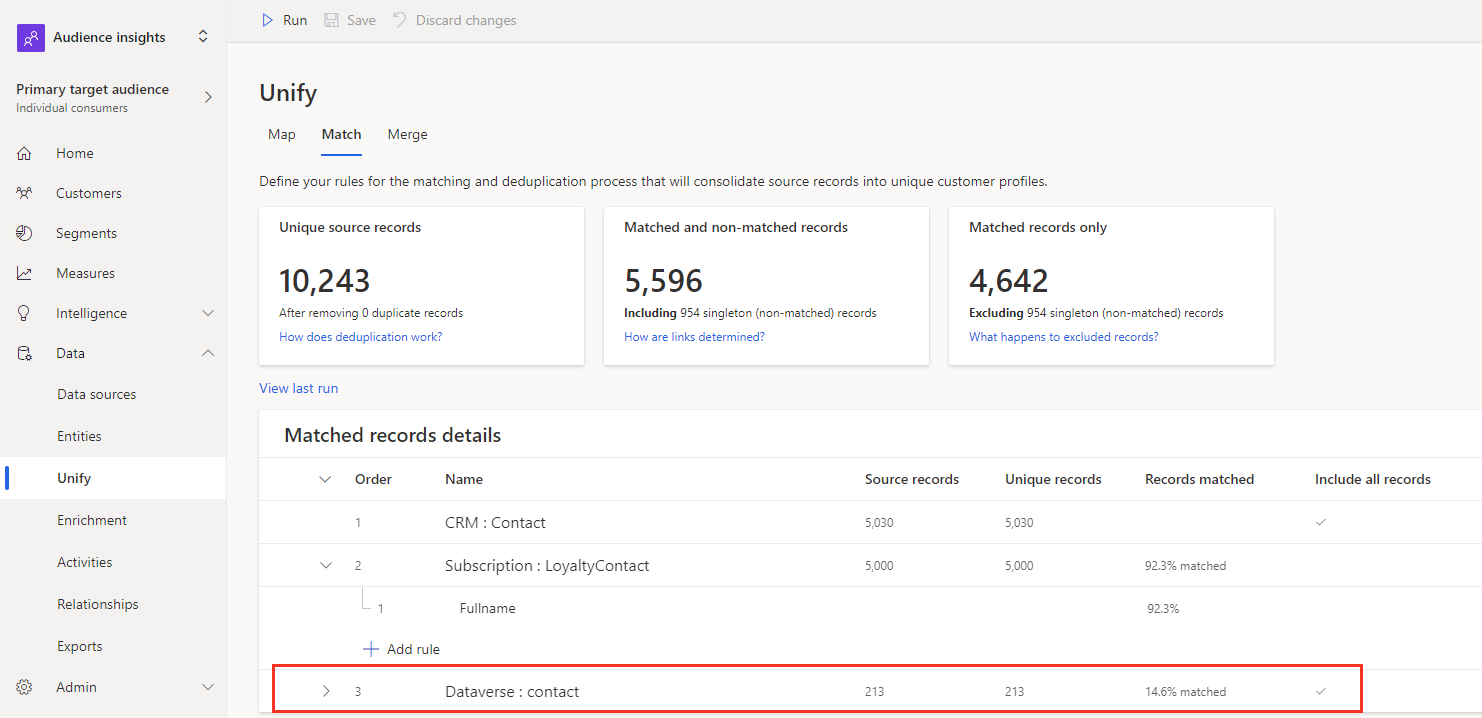
Once matching is complete, we combine some common fields such as first and last names in the contact tables in different data sources. Then we merge the contact records from all the three contacts entities. We create customer profile records in Customer Insights.
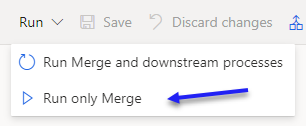
We run only Merge in this step.
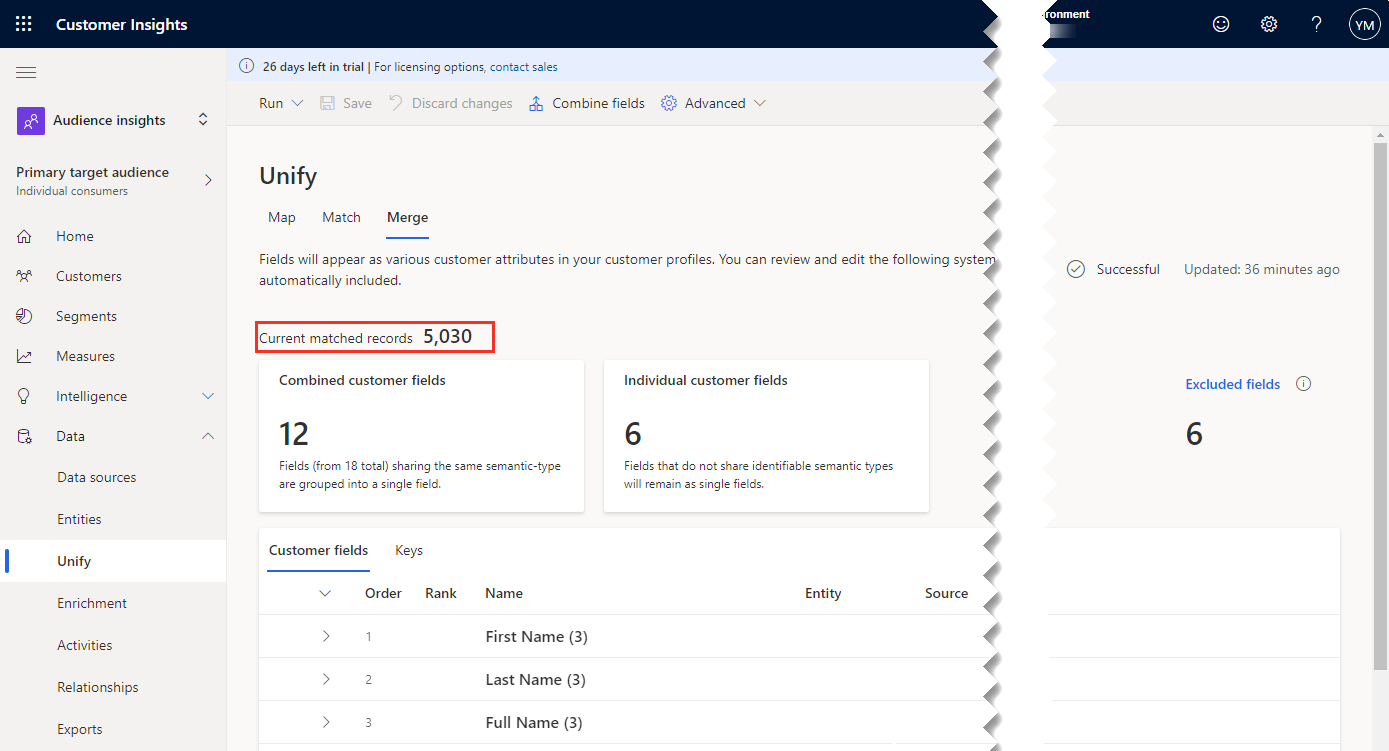
In this example, 5,030 customers are created in Customer Insights profile.
We configure activities in Customer Insights. These activities are associated to the contacts from different data sources. One is online purchase activity in eCommerce system; another is in-store purchase activity in loyalty program system; and the other is opportunity in Dataverse in Dynamics 365.
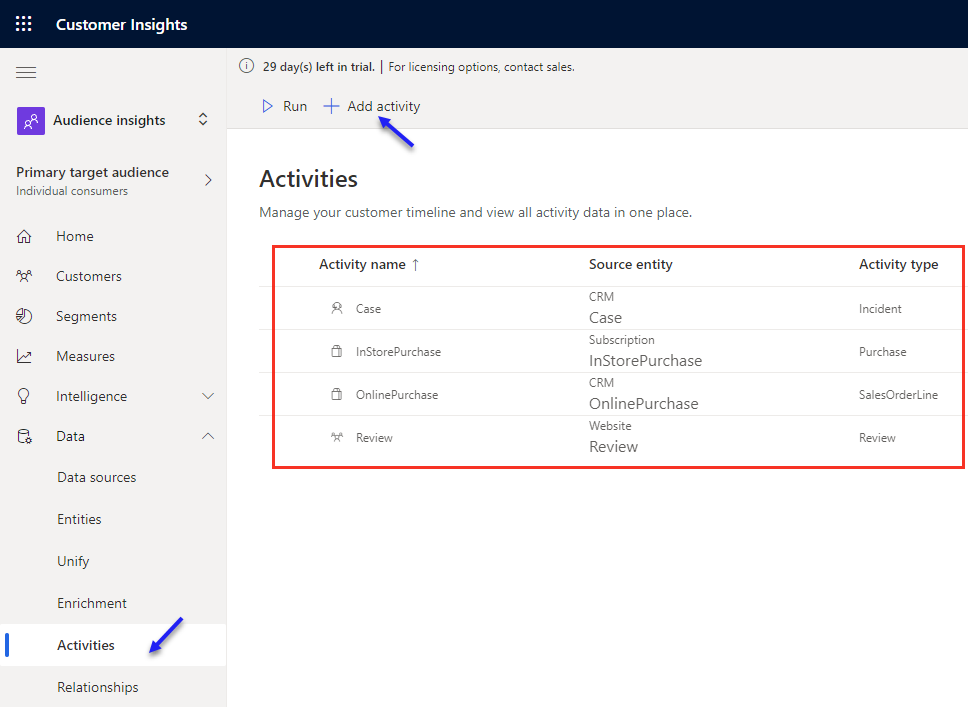
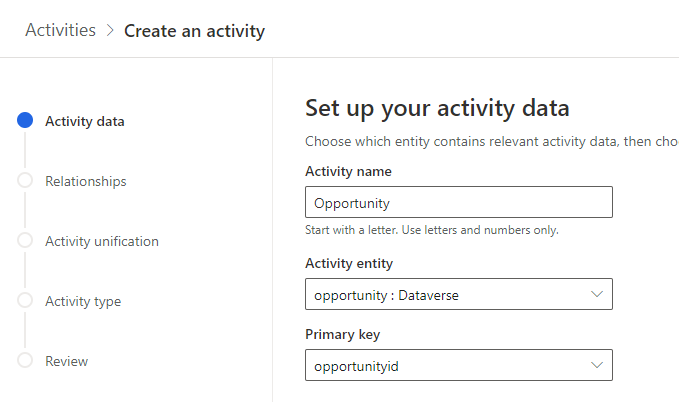
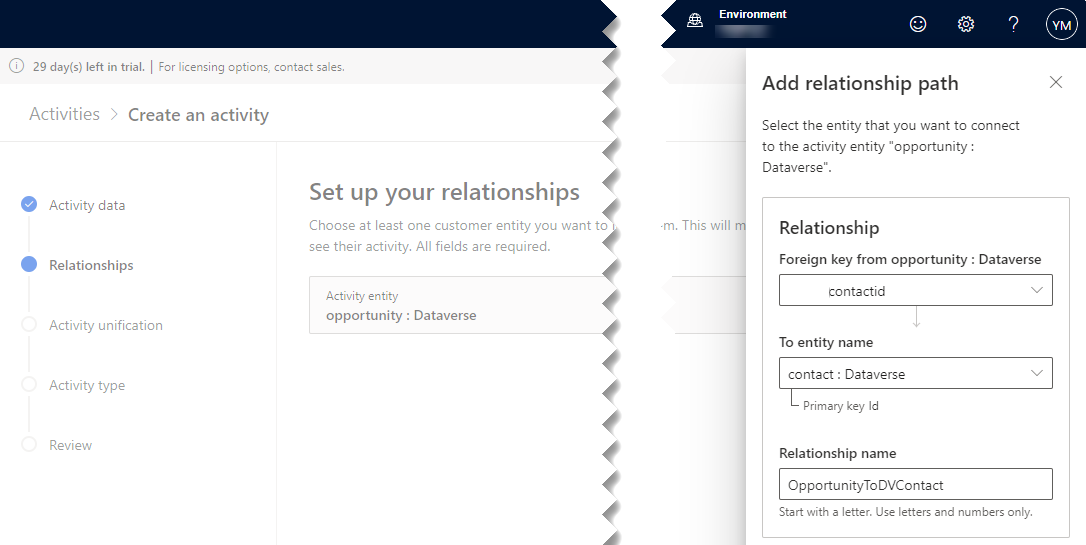
Let’s create an activity for opportunity. Wizard walks us through to complete the configuration.
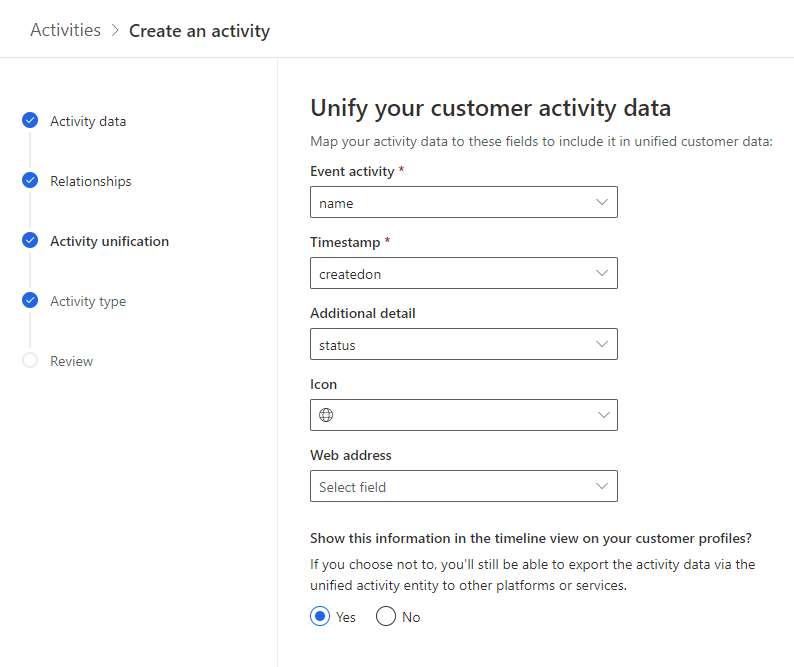
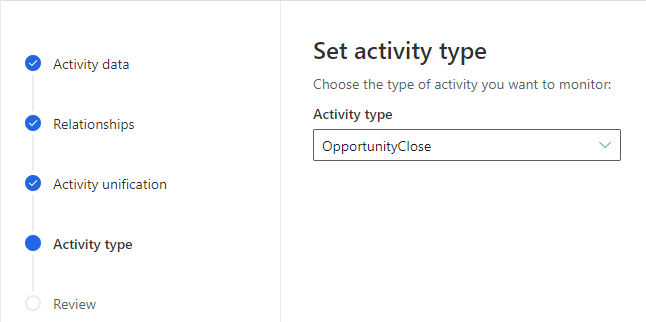
After reviewing, click on “Save activity” button. We run the activities to associate the customer profile and run “Run Merge and downstream process” in Merge in Unify.
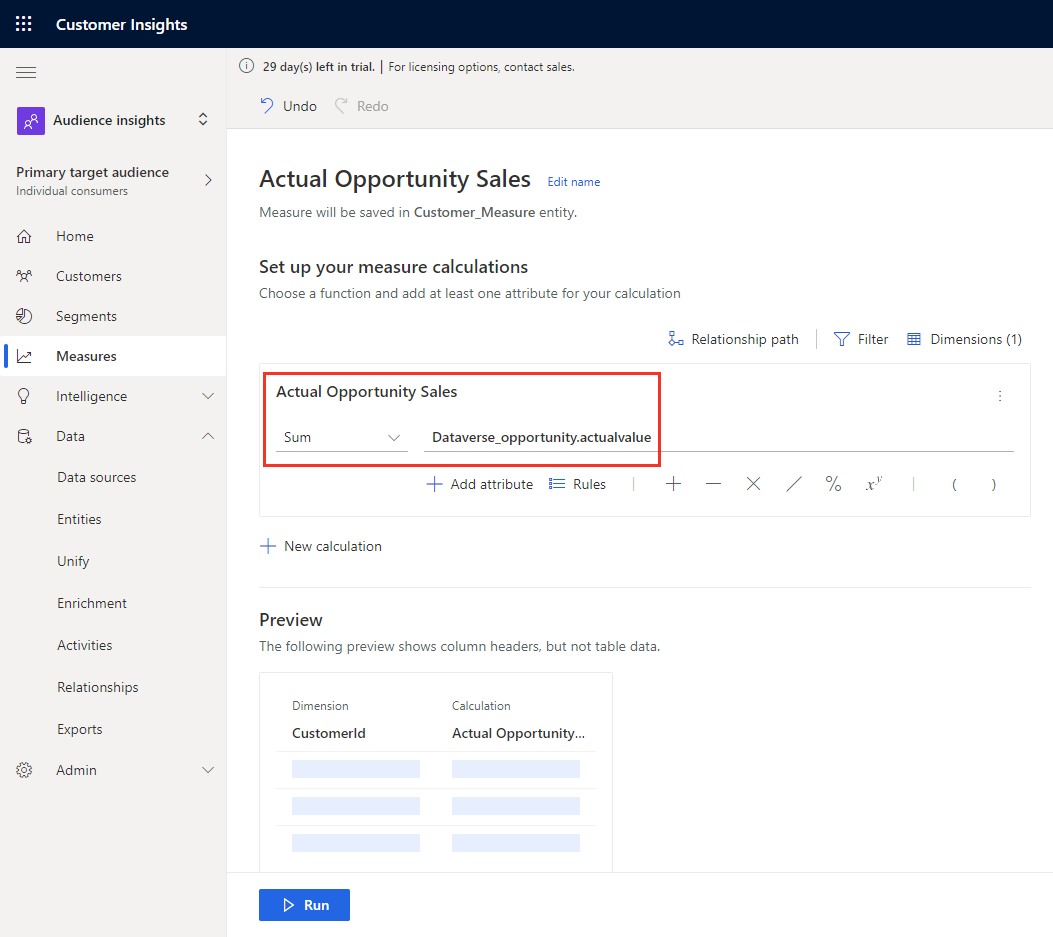
We can create a few measures and segments. In this example, we create actual and estimated opportunities sales measures.
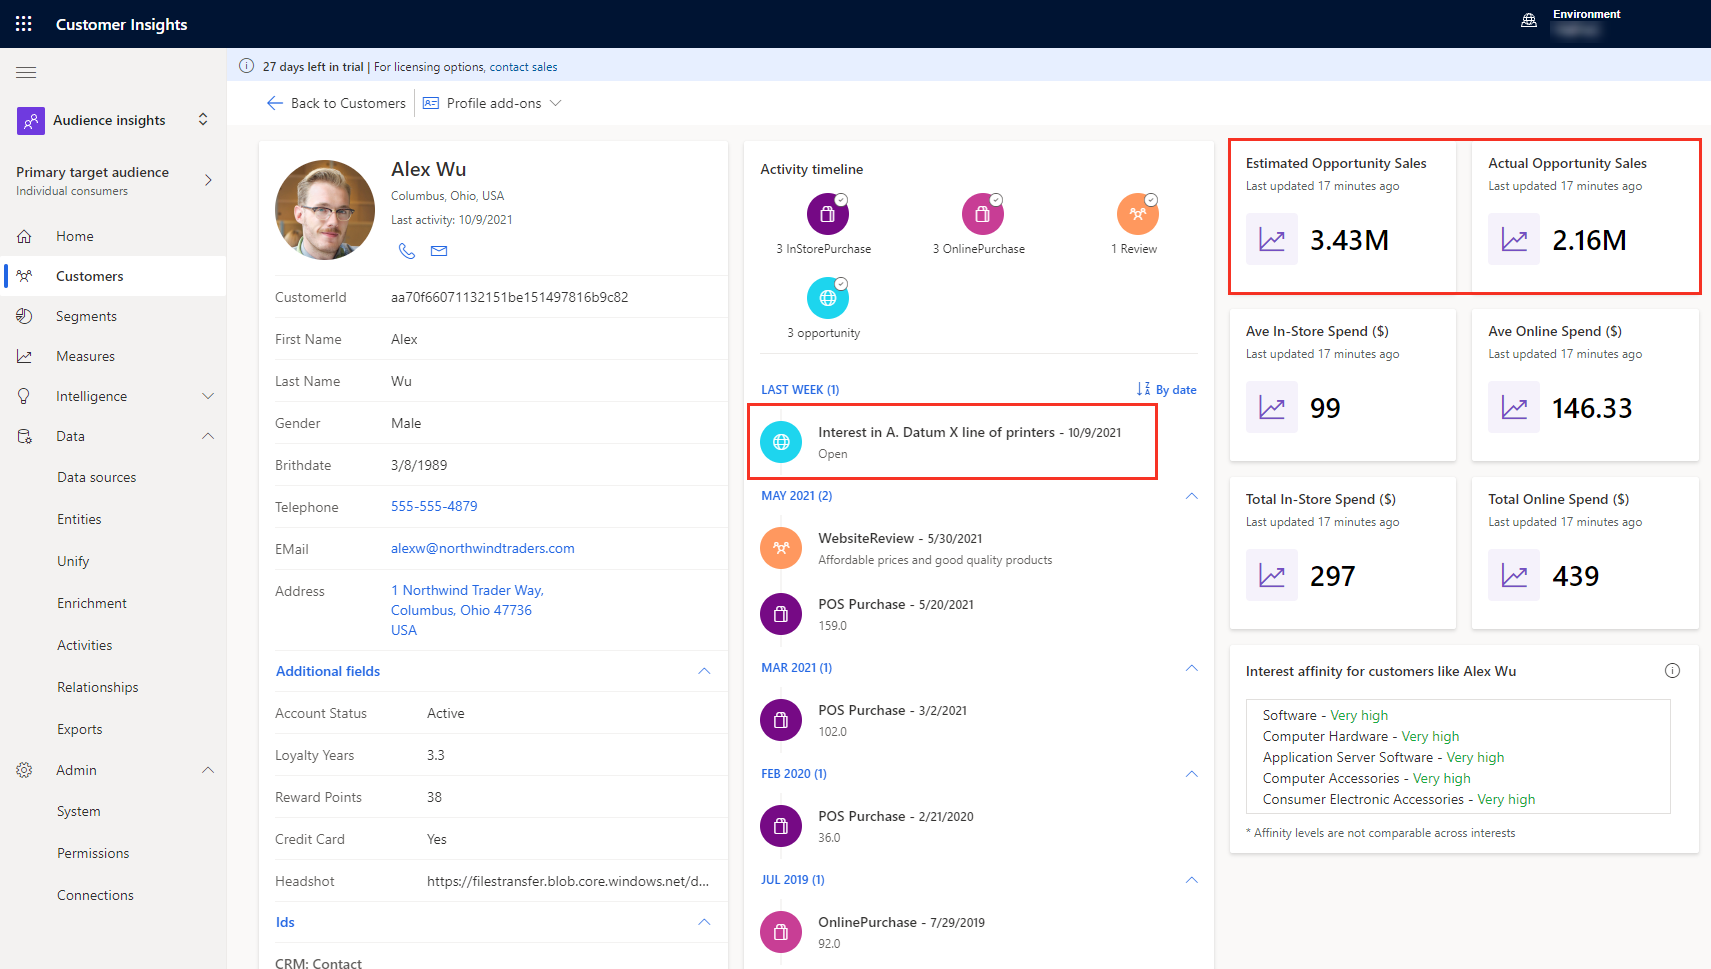
Here is an example of a customer profile from Dynamics 365 and other systems. We can see an opportunity with open status and sales measures for actuals and estimates sales!
Happy Customer Insights-ing!