How Microsoft Power Platform is helping to modernize and enable...
In this webinar, our experts showcase a variety of demo use cases of how different components of the...
Many organizations we work with have been seeking the ability to capture additional data at the time that an Opportunity is closed. Previously, that ability has not been easily available out of the box. In today’s blog, we’ll walk you through how it can be done.
In order to utilize this functionality, follow the steps below to create a new Quick Create Form, to which you can add default and custom fields that will allow your organization to capture the data relevant to the close of your Opportunity. Additionally, you can add script to customize the experience even further, if needed. Check it out…
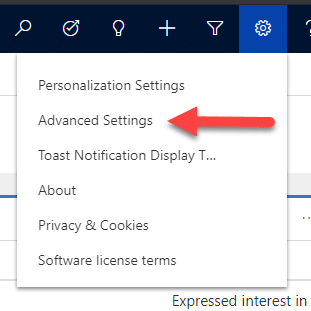
1. To enable the customizing of the close opportunity form, first open the Customizations section of Dynamics 365.

2. Click Advanced Settings.
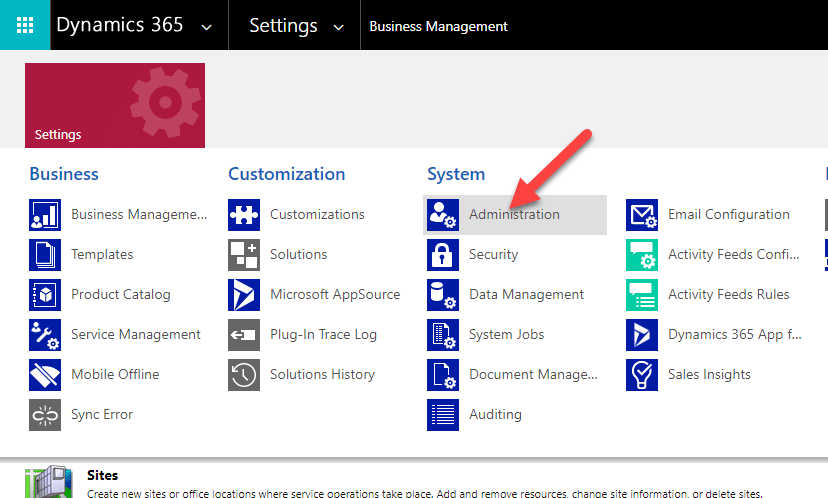
3. Navigate to Settings > System > Administration.
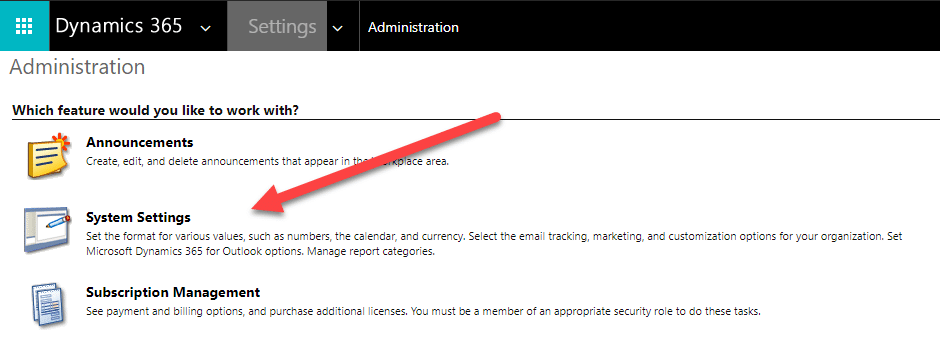
4. Open System Settings.
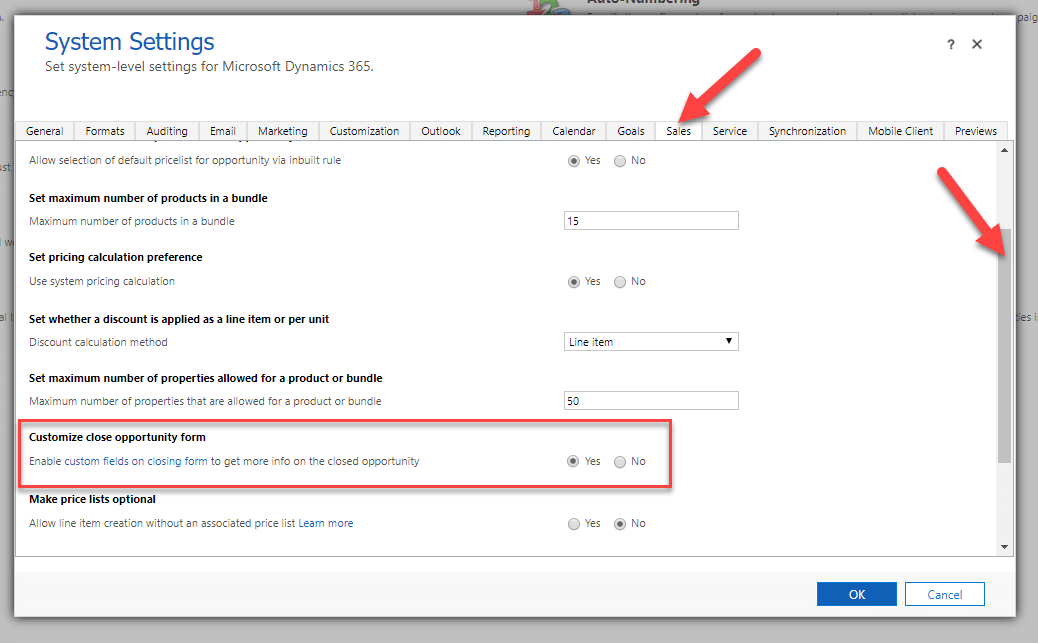
5. On the Sales tab, scroll down and click Yes in the Customize close opportunity form field.
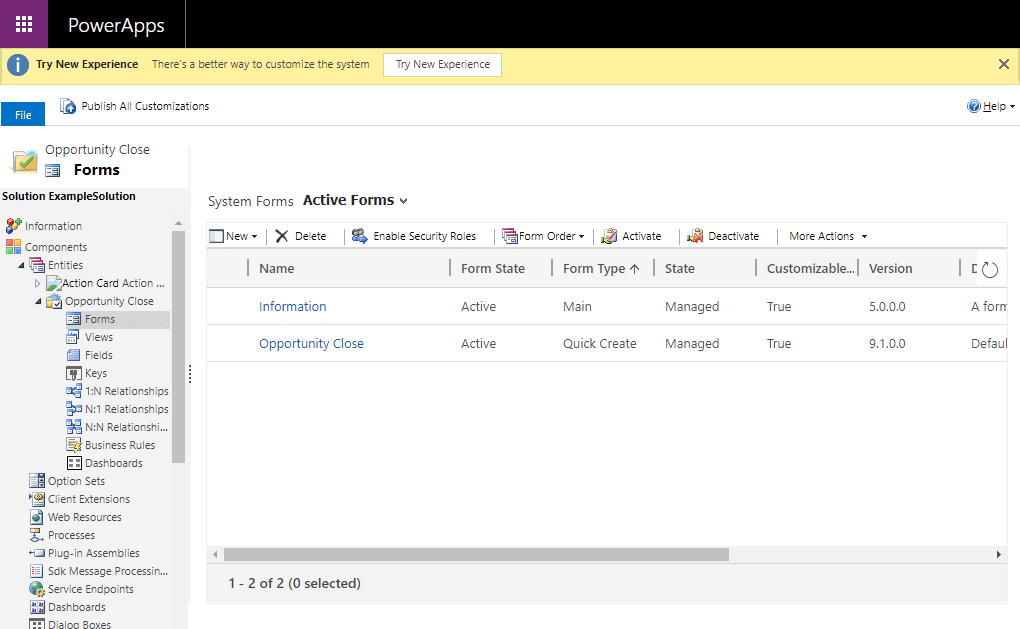
6. Then navigate to the Opportunity Close entity’s Forms customization screen – Settings > Solutions – and open the solution you would like to work within. Make sure to add the Opportunity Close entity if it is not already in the solution.
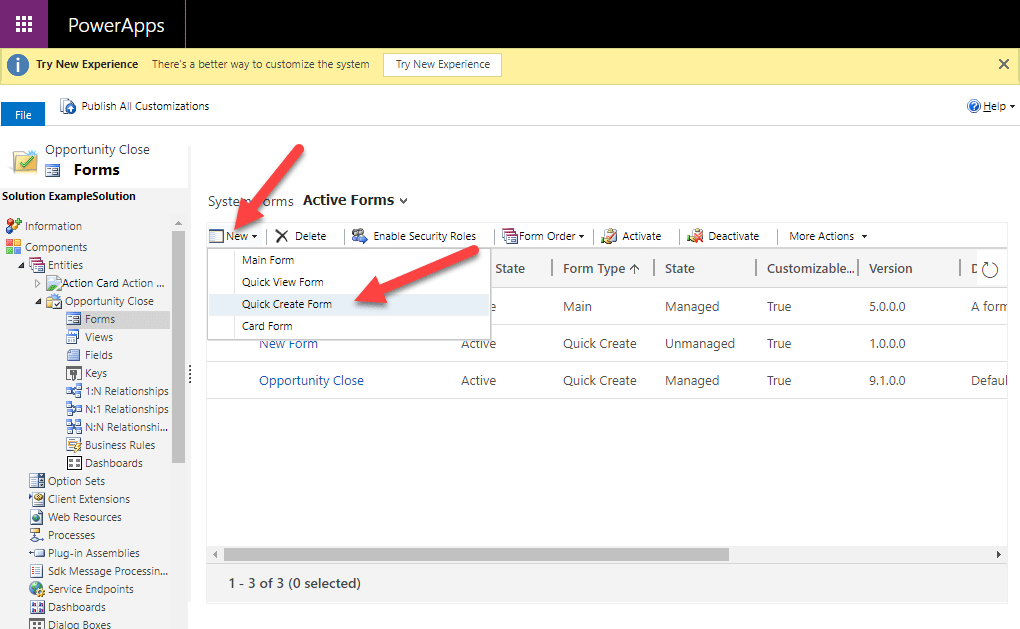
7. Create a new Quick Create Form.
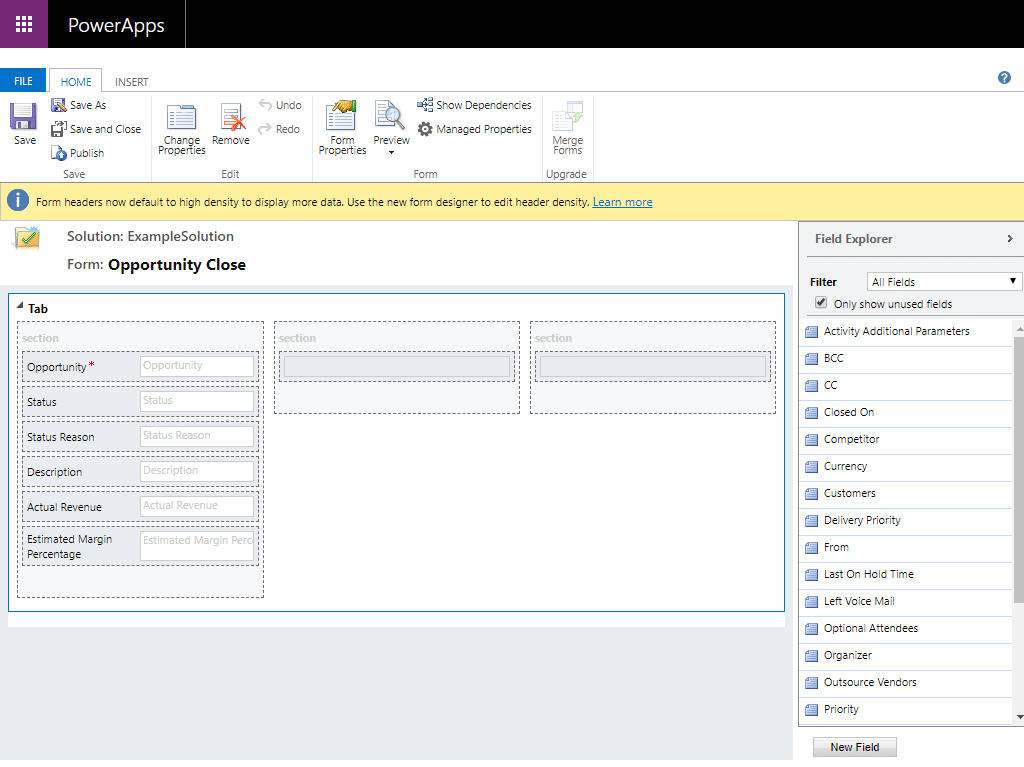
8. Add any existing or custom fields needed to capture the relevant data your organization needs.
9. Publish your form and test it.

Piece of cake, right?
Be sure to subscribe to our blog for more tips and tricks! Happy D365’ing!