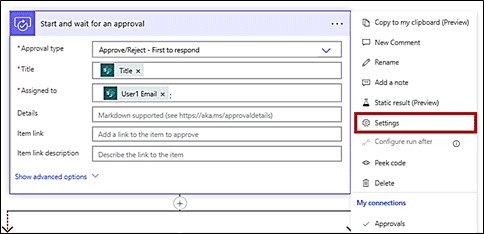
In business processes, we sometimes require approvals to occur before advancing to the next step in the process. Power Automate allows us to streamline approval processes with an action called “Start and wait for an approval.”
While approvals can take some time to gather, we do not want to let them sit in queue forever. So, to prevent extended approval waiting times, we can add timeout values. By default, the approval timeout occurs after 30 days. However, we can modify this using the steps highlighted below. This blog also highlights custom actions that can be taken when a timeout occurs while waiting for an approval.
Adding custom time values for approval timeout:
- Click on the Settings for the Start and wait for an approval action.
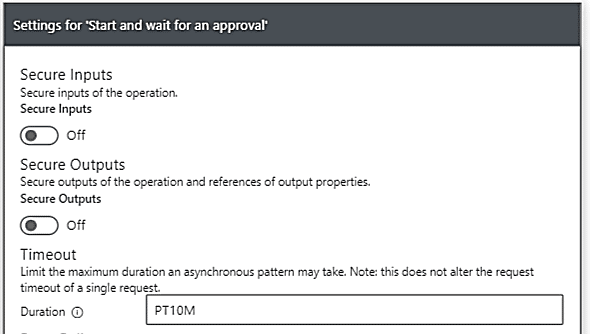
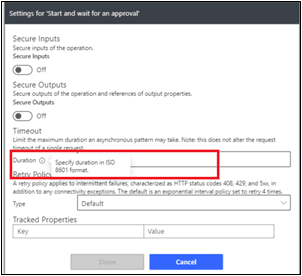
- The Duration box will appear right underneath the Timeout. The value in this field should be in ISO 8601 format. For this blog I will be entering a timeout value of 10 minutes (that is PT10M in ISO 8601 format).
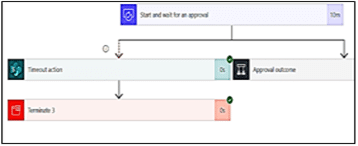
- If the assigned user for the approval step doesn’t perform any action on the request, the request will automatically timeout after 10 minutes as described in step 2. We can also configure an action that should trigger if timeout occurs; the steps to configure such actions are described below.
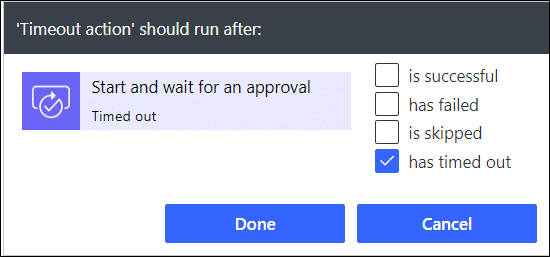
- Click on the three dots for an action process (For this blog I have used update SharePoint action “Update a row.”) Then click on Configure Run After as shown below:

- Select the has timed out checkbox and click Done.
- After configuring the timeout branch. we can start an approval action and then wait for 10 minutes for that action to time out. For this blog, I have chosen to Reject the approval if it has timed out, as shown below. The flow will successfully terminate after this step.
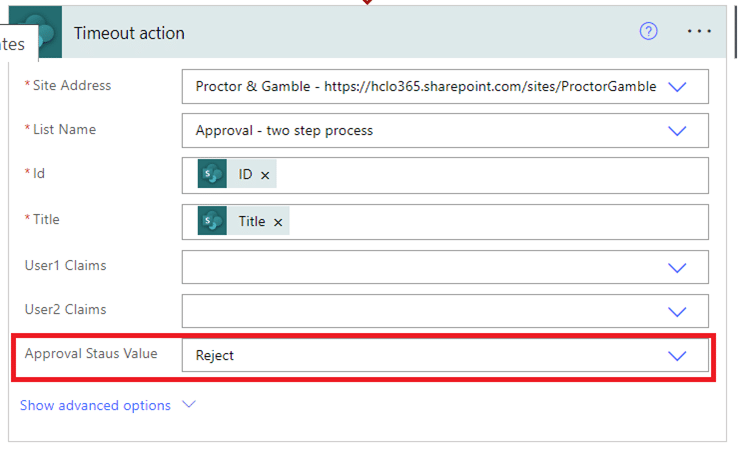
- After the flow runs successfully, the SharePoint list will be updated with Reject status.