How Microsoft Power Platform is helping to modernize and enable...
In this webinar, our experts showcase a variety of demo use cases of how different components of the...
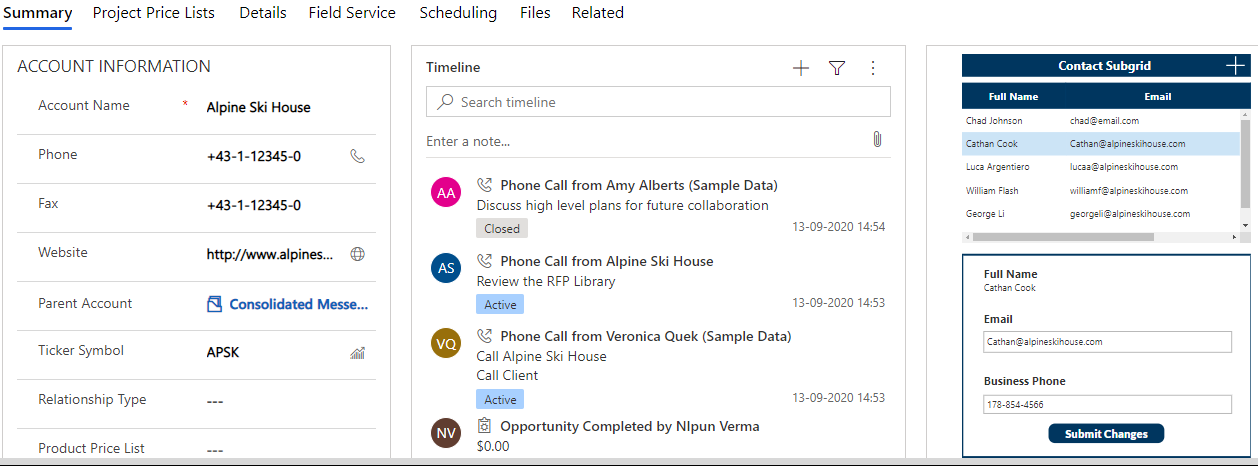
One of the features that we are quite excited about in Customer Engagement is the embedding of the Canvas Power Apps in Dynamics 365. Many say this was the replacement of the Dialogs, but it does more than that.
With the popular demand of working with Power Apps it would be great to have the ability to create/update the records via the same. The scenario we would be seeing is to fetch all the child contacts of the account as a sub-grid on a form providing the ability to update the existing Contact or Create a new contact with an ease via Power Apps without even opening the Contact form in a new window or a quick create.
In this article we will focus on the following topics:
1. Add an embedded canvas App on the form. Follow this Microsoft article to add the Canvas app control on the form and follow the article till step 12:
2. Once the PowerApps studio is open we would see an already added form control on a screen (FormScreen1).
3. Delete the form control from the screen > Add a blank Data Table control “DataTable1” > Set the Data Source to “Contacts” for the moment. Once the data table is connected, we would see all the contacts from the CDS environment as currently there is no filter added to it.

4. Select the Data Table control “DataTable1” on the screen > set the Item property >
Filter(Contacts, AsType('Company Name', [@Accounts]).Account = [@ModelDrivenFormIntegration].Item.accountid)
This is going to filter all the contacts for the current account reference. @ModelDrivenFormIntegration control is bringing contextual data from the host model-driven form to the embedded canvas app.

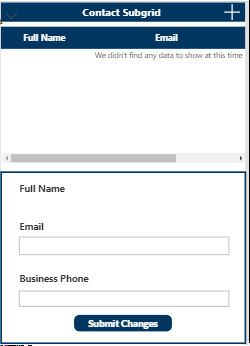
5. Select the fields that we want to show in the Data Table e.g.: “Full Name”, “Business Phone”, “Email” > To change the fields, use the Field Properties of the Data Table control.
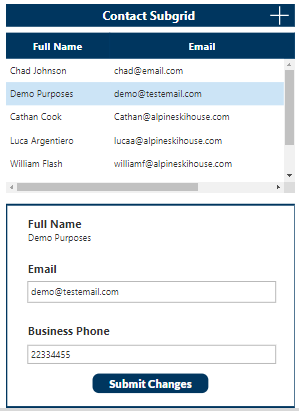
6. Add a form control to the “Contact Subgrid” screen. (This will help us edit the fields of the selected sub-grid record).
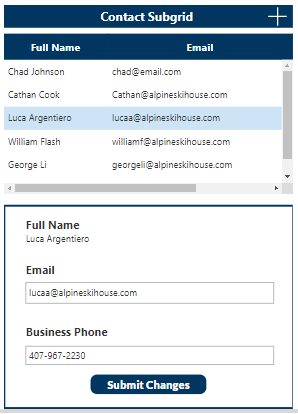
7. Select the screen “Contact Subgrid” > Insert the Edit Form “Form1” and place it below the data table “DataTable1” > Add Contact as a data source for this form “Form1”
8. Set the Item property of “Form1” to DataTable1.Selected > Now, when you select any contact from the DataTable1, this would populate its data in the Contact Form that we just added and then we can edit the contact.
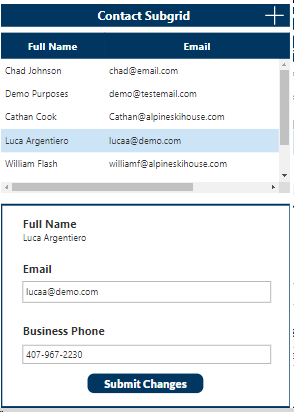
9. In order to submit the edited fields to CDS > Add a button on the form control > Set the On Select property to SubmitForm(Form1);Refresh(DataTable1.Selected).This would submit and refresh the list of contacts in data table..

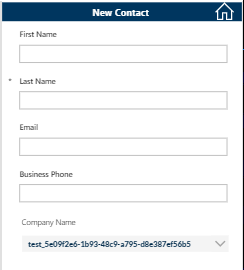
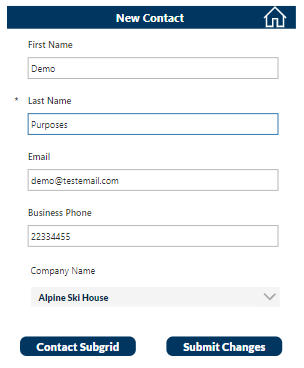
10. Add a new screen “ContactScreen” > This will create a new contact for the same account reference.
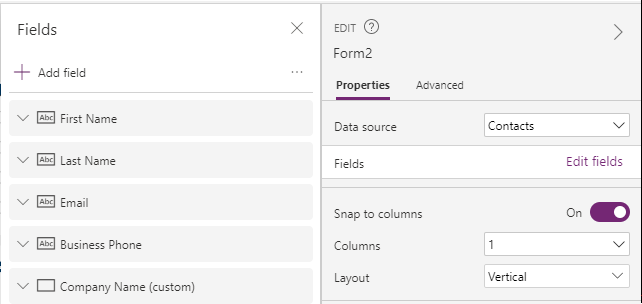
11. Insert a new form control Form2 on this screen > Set its data source to Contacts. Also, Edit fields > Add First Name, Last Name, Email, Business Phone, Company Name.
12. To Fetch the Company Name for this contact > Add the Company Name field/card on the form using this Form2 field property > Unlock this data card Company Name_DataCard1 using Advanced property of Form2 from the right menu.
13. Insert a Dropdown from the Input tab Dropdown1 > Label inside the "Company Name" field data card. Set the label Text property to “Company Name”.
14. Set the Dropdown1 Item property to Accounts and Default property to [@ModelDrivenFormIntegration].Item.'Account Name’. This will pass the current account reference to our data card.
15. Select the Company Name_DataCard1 and set its Update property to Dropdown1.Selected. The form would look like below:
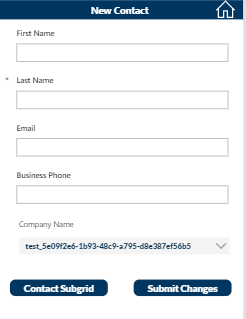
16. Add two buttons at the bottom of this form Button1_1 and Button1_2.
17. Set the On Select property of the button Button1_1 to SubmitForm(Form2);Navigate('Contact Subgrid') and the Text property to “Submit Changes”.
Note: This would save our new form with the same account refrene in CDS.
18. Set the Button1_2 On Select property to Navigate('Contact Subgrid') this would take us back to the main screen of the append set the Text property to Contact Subgrid. Our second screen should look like below:
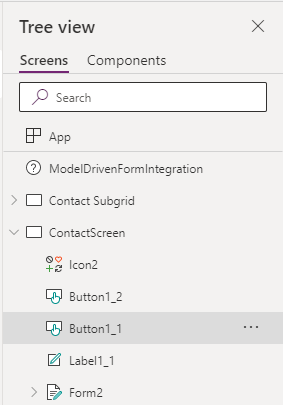
19. Add an icon ‘+’ on the main “Contact Subgrid” screen (Opens a blank Contact form) > Set the On Select property of this icon to NewForm(Form2);Navigate(ContactScreen,None).
20. Save this app > Publish this app from power app studio. Refer the article if required:
21. Check how this App works in CDS environment.

Note: Same logic can be applied to other entities as well.
Reference Links: